Archive for the ‘Action Figure Drawing Tutorials’ Category

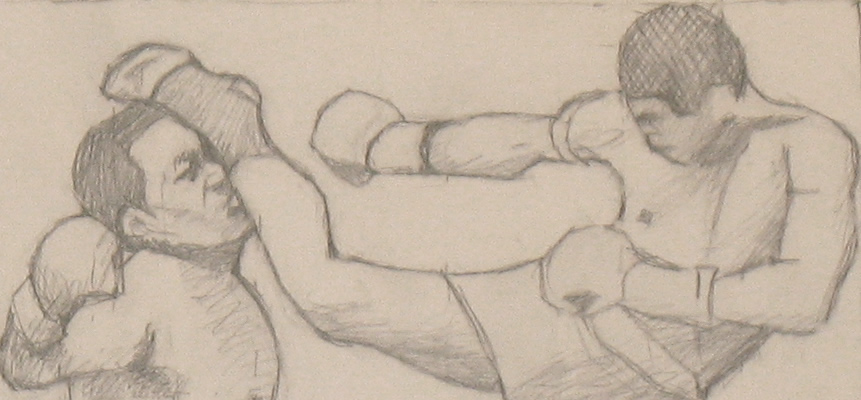
Action Figure Drawing Tutorial #2: Measure, Grid, and Negative Space a Kick Boxer

Monday, February 6th, 2012

In this series of drawing tutorials, we turn to drawing the human figure in moments of intense action (my previous series sketched the hand in many different positions).  

I began these action sketches as my own “notes” for a satirical PLAYGROUND OF THE AUTOCRATS canvas I’m painting, picturing medieval Russian noblemen and women viciously competing with each other for influence with the Tsar.  When I create my actual painting, I’ll dress the people I’ve sketched in rich, historic Muscovite costumes.

Meanwhile, I’m also using my preparatory sketches here as tutorials to demonstrate my easy method of drawing.  Today I’ll show you how to measure, create a custom grid, and visualize negative space via “right brain mode” to see your subject as a series of easy-to-draw, flat shapes. 

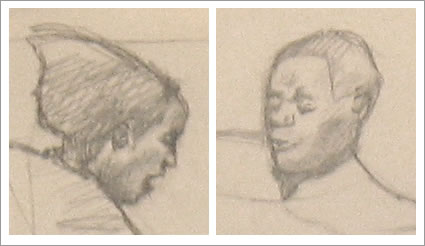
Detail (upper half) of this tutorial's kick boxer sketch

Intro

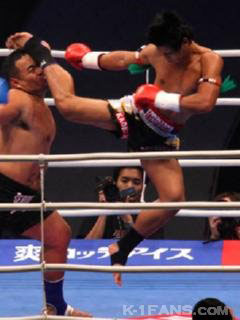
Photo of kick boxers used as model for sketch

For more info about the basic why and how of this series, please see my introductory post.

Today’s demo is my sketch of a photo of kick boxers.

This pose appealed to me partly because of the super-active twist to the body and kicking leg.   I’m also looking for “models” of faces being savagely pushed.  I’m not a violent person!  But I am very interested in painting visual manifestations of people’s most powerful and basic emotions.  Because we often keep such emotions hidden, I use satire in my PLAYGROUND OF THE AUTOCRATS artwork to convey them in physical form.

Setting up to sketch the tutorial

Please see the relevant sections of this post for set up and materials.
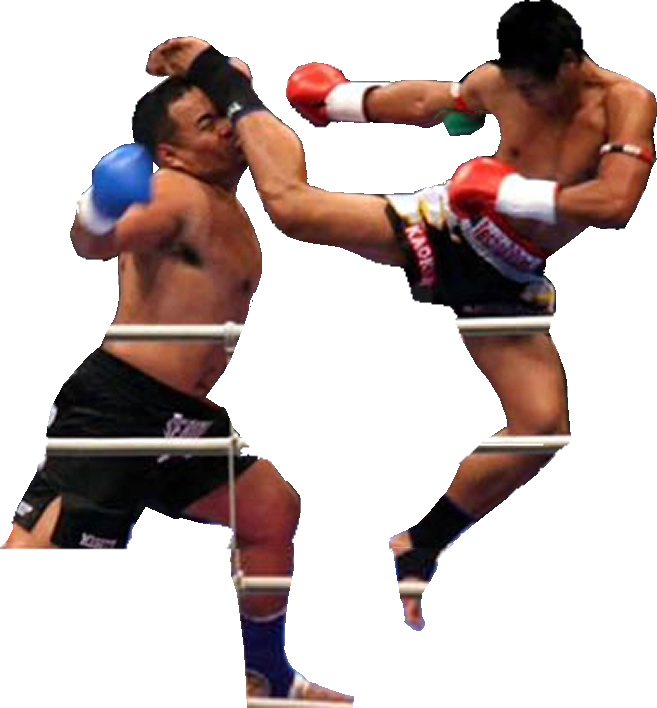
Composited and trimmed photo used as model for this tutorial

I often begin by “cutting out” the action figures I want to sketch, so I can see them clearly and vividly as I work.

I always want full-body photos because I don’t yet know how much of each person will show in my final painting.  But often the most exciting sports photos focus in on the core details of the action, cropping out part of the bodies.  Then I just have to work with what’s available.

In this case, I had found two images of the same photo, cropped differently. So I combined the two in my computer, to see as much of each body as possible (above).  I’ll ignore the boxing-ring ropes as I sketch.

Beginning your sketch with a negative space and a few measurements

I often begin by drawing a negative space at the upper left of my sketch (for the basics, scroll down to “negative space” here and here).

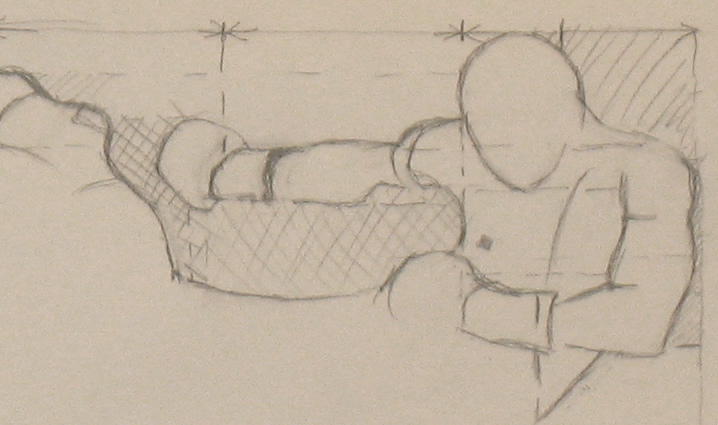
Negative spaces in KickBoxer sketch

Detail of my sketch in progress, with hatching over two negative spaces I used to draw accurately.

But in this particular pose, the smallest easy-to-draw negative space is in the upper right corner.  So I began there.  You can see this space in the detail of my sketch (right).  You can also see another very useful negative space I used later, between the arm and leg of the kicking boxer.

How can you set down that very first space accurately?  One way is to begin by measuring its edges – often artists use their finger on their pencil to create a “unit” of measurement.  You can also eyeball the edges of your paper to divide it into thirds, say, or quarters, then check you’ve done that accurately by using your finger on your pencil as a measure.

When you watch the video below, notice in the first frame that I began by dividing the right margin of the page into thirds – then the top  third into fifths.  This may sound technical as you read it, but it will become natural as you practice it because this technique helps so much to shape your first few lines accurately.

Throughout the video below, I marked arrows on my paper so you can see the size comparisons I made to judge accuracy.  I usually make these size measurements only in my mind’s eye.  In the video, I’ve drawn arrows (and later erased them) to make them evident to you.  You may want to go through the video several times, at least once just focusing on these measuring devices.

Creating a custom grid to help your drawing

Perhaps the most useful tool I use is to note the horizontal and/or vertical relationship of any line I’m about to draw to other elements I’ve already completed.  Example: the edge of the kicker’s forehead is directly over the outline of his chest.  I represented this in the sketch detail above by a vertical dotted line.
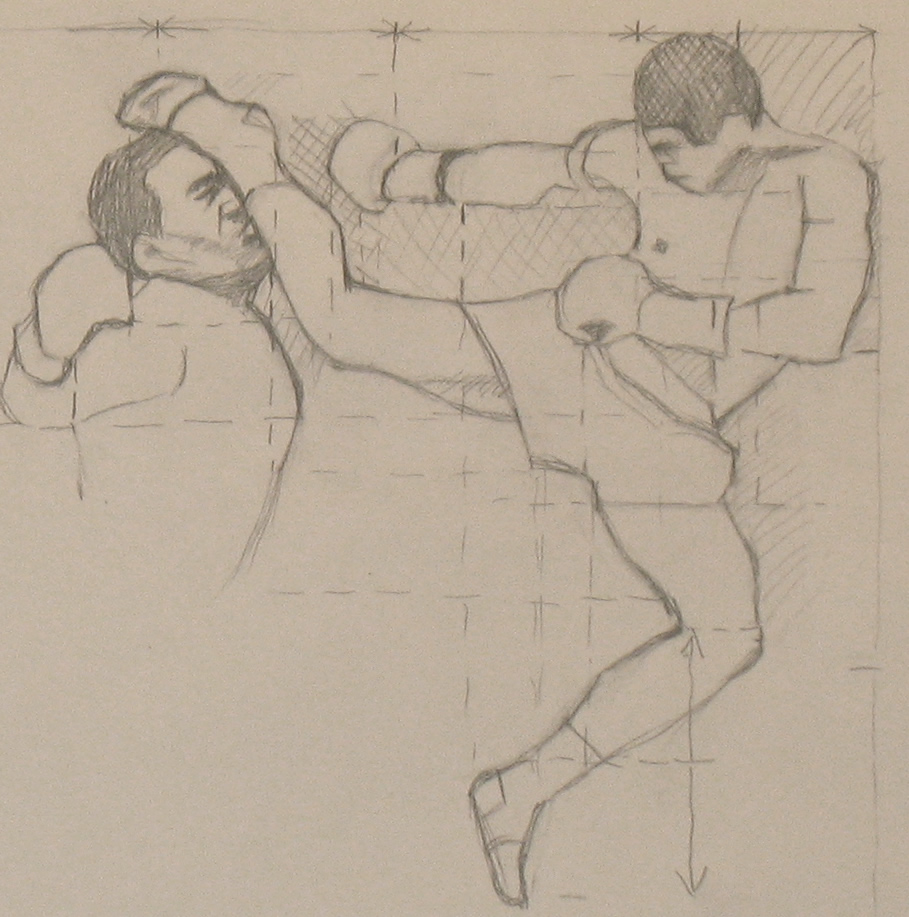
Still of sketch in progress shows dotted lines, hatching, and arrows used to aid drawing.

Again, I often envision these spacial relationships only in my mind’s eye.  In the video at the end of this post, I marked the relationships I used with dotted lines (later erased) to make them obvious to you.  For example, the left corner of the kicker’s shorts ends almost directly under the upper end of his glove.

As you watch the video, you’ll see how doing this creates a “custom grid” that helps me sketch accurately.  Grids are an an almost magically helpful artists’ tool (for more on grids, see this post).

You may want to go through the video at least once just watching when and how I used these dotted lines to show me exactly where to place my next pencil mark.  Play a game with yourself to see whether you can figure out why I envisioned each dotted line at the particular moment I did:  Which body part of the kickboxers (or their clothing) did it help me complete?
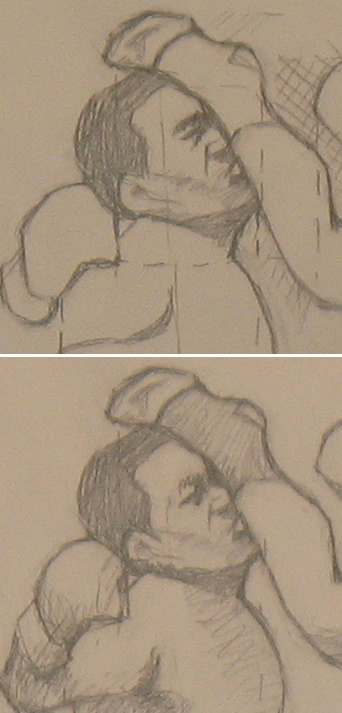
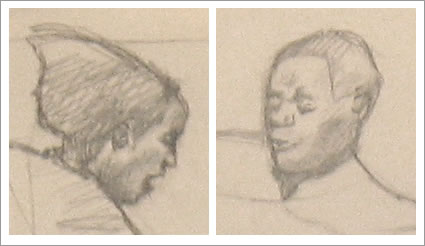
Kicked Boxer face

Faces are drawn the same way as everything else: by seeing all the features via "right brain mode" as flat shapes that are easily drawn using measuring and grids. Can you spot the subtle differences between the top version of this face and the bottom one? Which do you find more expressive?

Using negative spaces

In the sketch detail above, you can see that, rather than e. g. drawing the boxer’s kicking leg, I drew the “negative” space between the top of this leg and the bottom of his arm.  It’s often far easier to draw a shape between parts of the body than it is to draw the muscles, knees, or elbows themselves.  The reason for this is explained here (and in more detail here).

Usually when I’m drawing, I envision a lot of these negative spaces in my mind’s eye.  In the video below, I marked some of the negative spaces with line- or cross-hatching, so you can see them.

But in fact, I constantly view all parts of my sketch as negative spaces to help me draw them more easily.  For example, the bit of the boxer’s waist that’s visible can be more easily drawn if you see it as a simple dark triangle: the negative space between his arm and his waistband.

Seeing an entire drawing as a series of negative spaces is what led to my concept of a jigsaw puzzle as a tool to help you draw.  Seeing your subject as a series of small, easily drawn flat shapes – each of which fits into those around it, like a jigsaw puzzle – is  paradoxically the best way to create vividly three-dimensional-looking drawings.

Video drawing demo

You may want to watch the following demo a few times, looking for different elements each time:

Arrows indicate equal measurements

Dotted lines indicate elements directly horizontal or vertical to each other.

Line- or cross-hatching indicates some of the negative spaces I used.

{"numImgs":"66","constrain":"height","cvalue":"450","shellcss":"width:432px;padding:4px;margin:14px auto 0;"}
Action Figure Drawing Tutorial: Stomping a Man Who’s Down

Monday, January 9th, 2012

In this next series of drawing tutorials, we’ll turn to drawing the human figure in moments of intense action (the previous series sketched the hand in many different positions).  The goal of this “action figure” series is to create quick sketches that you may later incorporate into more finished pieces.  

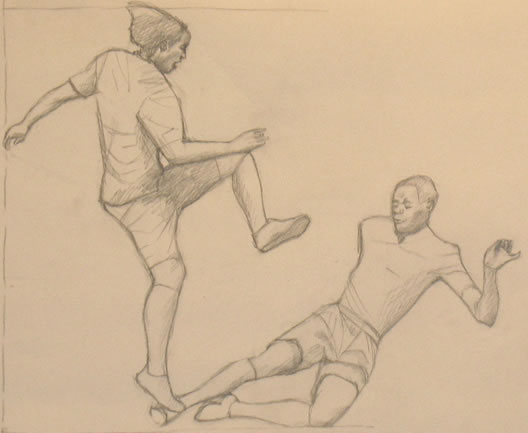
Detail of the two faces of soccer players in this action figure sketch

In these tutorials, I’ll teach you to use “right brain mode” to see your subject matter as a series of easy-to-draw, flat “jigsaw puzzle pieces.”  Paradoxically, sketching these small, “flat” areas produces a vividly three-dimensional-looking drawing.

 At the end of this post is a short video of how I drew the sketch below, using my “right brain” to visualize the drawing as a series of small, simple jigsaw puzzle shapes and creating a “custom grid” to help me draw them accurately.

Sketch of soccer players

Finding models for drawing human beings taking extreme action

Like many artists, I often want to draw people striving to achieve something they want very badly.  These are dramatic moments of life in which people’s deepest longings surface in their body language.

Unless you have a skilled model continually available, who can replicate what’s in your imagination and hold poses of extreme physical effort, you’ll rarely be able to draw these moments from life.  Yet as an artist, I always want to sketch from some kind of model, not from memory.

Drawing from memory means drawing a preconceived image of what a given action should look like.  For me, the thrill of doing art is falling in love with some new and very particular live body movement each time I draw.  Since I don’t have an always-available model who can embody the highly-specific scenes in my imagination, that means finding photographs that can serve as my models.

I often want to sketch some vivid action I can’t even find a photo of.  For example, I’m working on a new painting about Ivan the Terrible in which various members of the 16th century Russian nobility attack each other.  Since my style in these triptychs is satirical, the assaults are stylized, not strictly realistic.  In my current painting, noblemen and women will stomp on each other, kick, pull hair.

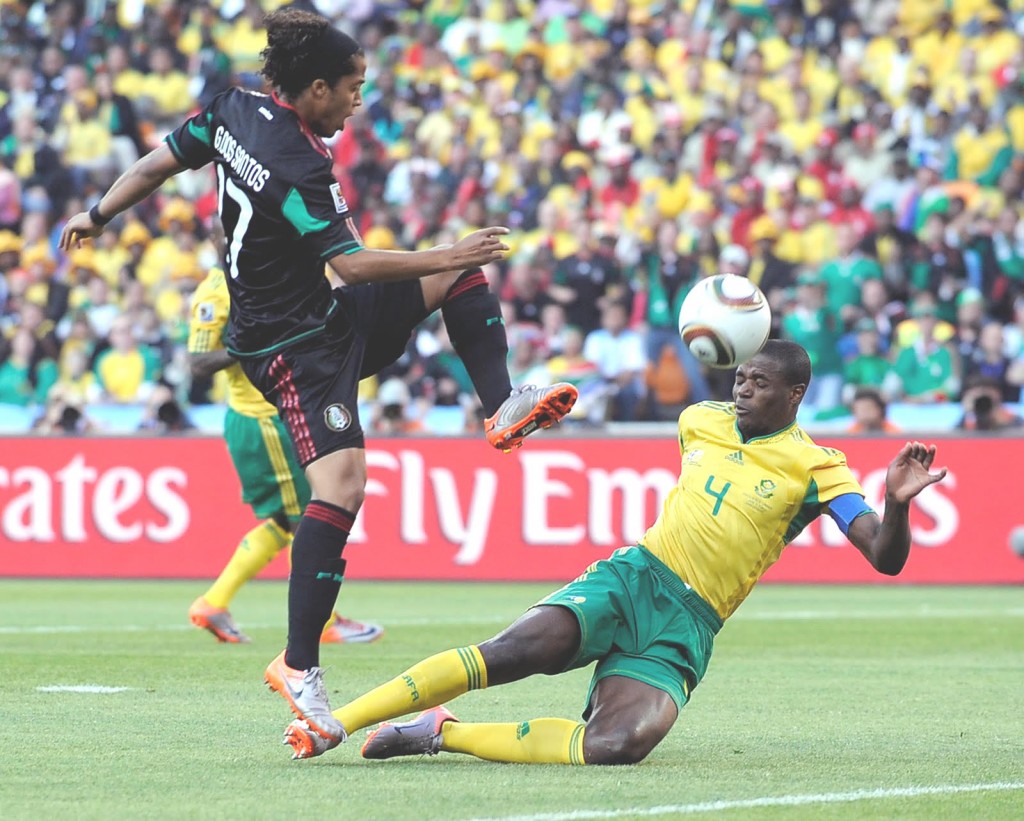
Photo used as model for this action figure tutorial sketch, "Stomping a Man Who's Down"

Often the best place to find images that at least approximate motions like this are sports photos.  Professional athletes give their all.  They’re not stiff or self-conscious, they’re completely in the moment.  Their bodies are often clearly visible, not hidden by a lot of clothing.  And because of the money and resources devoted to sports, you can always find high-quality, high-resolution images to serve as your models.

Action sketch tutorials

I chose the photo above for my own sketch because, at the moment it was taken, one player appeared to be stomping the other, who had half fallen to the ground.  For your own tutorial practice, either try your hand at this photo  or find another one that appeals to you.  My right-brain-mode “jigsaw puzzle” method applies to anything you choose to draw.

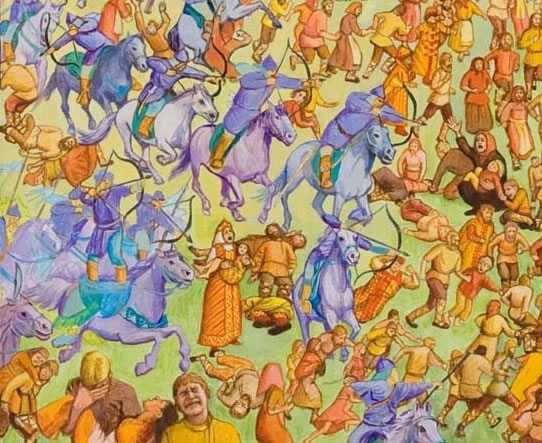
Detail "The Most Exposed Terrain on Earth"

Detail of center panel of "The Most Exposed Terrain on Earth," by Anne Bobroff-Hajal

For my own painting – and in these tutorials – I’ll be making a whole bunch of these action sketches. Later I’ll integrate them into my large Ivan the Terrible painting, which will portray a lot of noblemen. When I finally paint these guys on canvas, I’ll dress them up in Russian noblemen’s duds. For now, I just want to quickly sketch their movement and their facial expressions.

Above is an example of the finished product in my work technique.  Each of the fleeing Russians, Mongol warriors, and horses in this detail of a larger painting were based on photos I found to use as models.

Materials you’ll need and how to set up your work space

Please refer back to the relevant sections at the beginning of this drawing tutorial for information on how to set up your work space and the materials to use.  For my preparatory sketches, I use simple printer paper and an everyday Papermate Sharpwriter #2 pencil.  These aren’t art materials, just ordinary items that are always at hand.  I want to keep everything simple – my goal is to capture the action scenes as quickly as possible and then move on to combining them into a larger artwork.

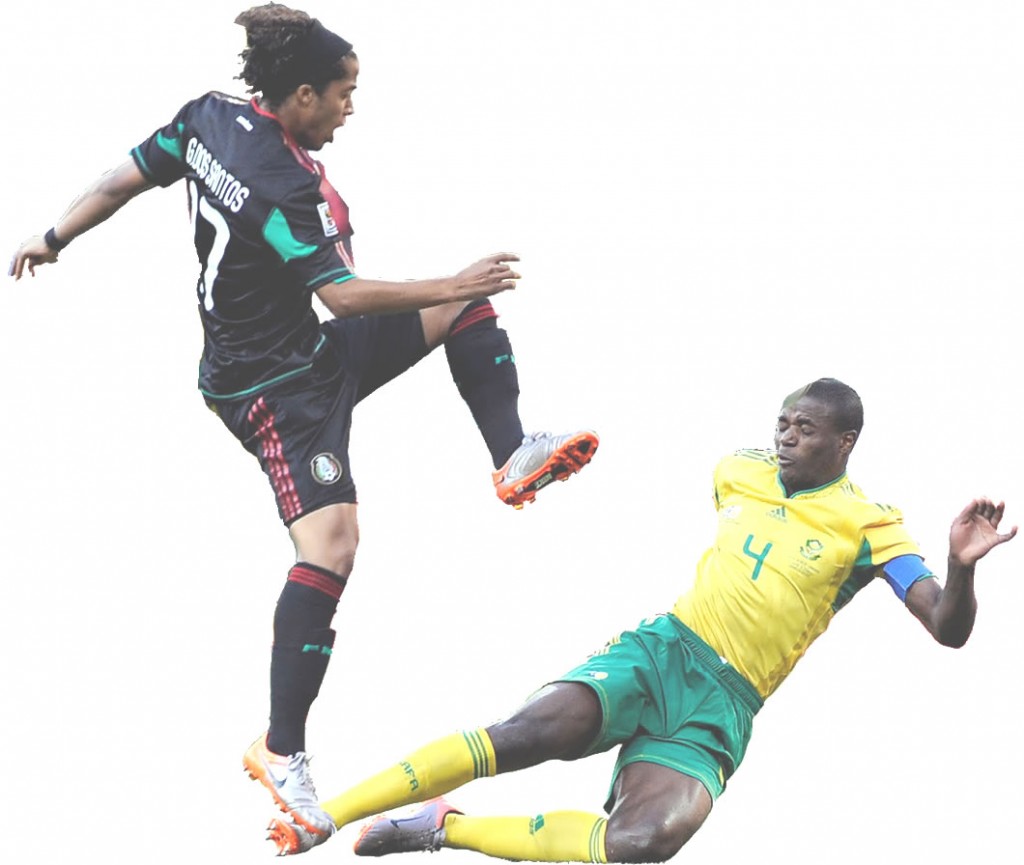
Photo trimmed of background to make clearer for sketching

Be sure to have your paper upright, not lying down or at an odd angle, which will distort your drawing.

Have your “model” photo as close as possible to you and your sketch, because “right brain mode” insights about shape and size last only a split second in the brain.  If you have to turn your body or move your eyes over a distance, you’ll lose that insight by the time you get your pencil back onto your paper.  (See this explanation for how the brain works in “right mode.”)

I always stand up when I’m drawing because it enables me to move back and forth to see the drawing from various distances.  These different perspectives help me see the drawing afresh each time I look at it so I can evaluate and improve it as I go along.

“Where do I start?  What do I draw first?”

People often ask me where to begin drawing on the blank page.

When I first took life drawing lessons many years ago, I was taught to begin with a very basic line describing the overall form of the model.  This was partly to be sure that the entire figure would fit into and fill the paper.  The second reason was that it was supposedly easier to add the details of the drawing once the basic overall shape was laid out, like a sculptor carving an approximate shape, then progressively more and more precise ones.

However, in the type of quick action sketches we’re practicing here, I’ve discovered over the years that for even the very first pencil (or charcoal) mark, it’s always easier to draw a small, simple shape than to draw a big one.  I often begin with whatever shape is in the uppermost lefthand corner, usually a negative space.  In this sketch of soccer players, I first drew the negative shape formed by the upper edge of the stomping player’s arm and back of his head.

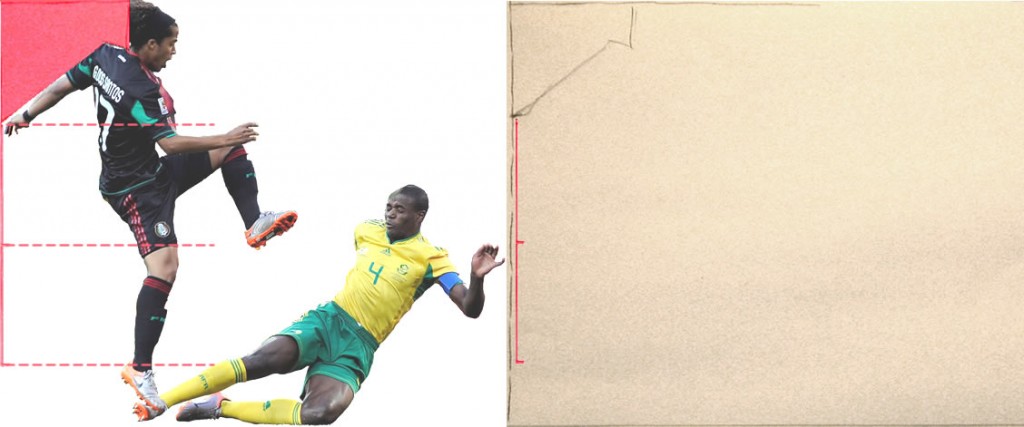
Left: First negative space as I envisioned it in my mind's eye, indicated in red on the photo (along with measurement to determine its size). Right: My paper with the first shape as I drew it (pencil). Measurement added on side in red showing how I determined size.

Well, you might say, of course it’s easier to draw that small shape rather than the big one of the entire body.  But how can you be sure to draw it the correct size to fit both people on the page?  If you don’t pay attention to the overall size of the two men, how can you be certain you won’t make that first corner so large that when you get to the bottom half of the drawing the legs won’t fit in?

The way you can still be sure to fit your sketch on your paper is to take a single quick measurement (I use my finger against my pencil to measure) to observe that the stomper’s hand sticks out to a level a bit less than one-third of the total height of the sketch.  Every shape you draw in this sketch will relate to and be measured by this first one.  So as long as you draw this corner of your first shape slightly less than one-third down the side of the paper, you’ll end up with the rest of the drawing correctly sized.

Drawing in “right mode”

In future tutorials, we’ll delve more into the concept of seeing your model as a series of flat “jigsaw puzzle pieces.”  For now, please look back at the video and text in this tutorial to grasp the basic idea.

Faces of the two soccer players

By the way, to quickly sketch in the faces of the soccer players, I use exactly the same technique.  I see each face as a series of shapes whose form and size I need to replicate.  It’s important to avoid thinking of what you’re drawing as eyes, nose, mouth, cheeks, forehead.  That will engage your left brain and make drawing much more difficult.  You can read more on why this is here.

Creating a custom grid as you draw

In an earlier post, I described how I create a “custom grid” as I draw, which enables me to correctly gauge the placement and size of each “jigsaw puzzle” piece of my drawing in relation to other pieces I’ve already drawn.

You can see this “grid” illustrated in the video below, where I’ve drawn in lines showing how I envision this “custom grid” as I work.

(My apologies for the jerky quality of this video.  Future ones will improve!)

{"numImgs":"49","constrain":"height","cvalue":"450","shellcss":"width:511px;padding:4px;margin:14px auto 0;"}