Archive for the ‘Hand drawing tutorials / demos’ Category

Hand Drawing Tutorial #14: Creating a Custom Grid as You Draw

Sunday, June 12th, 2011

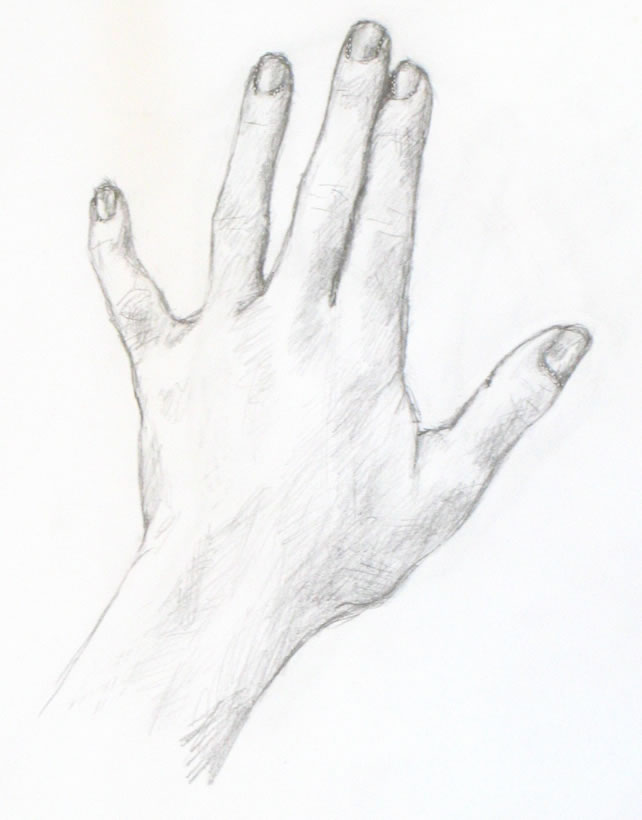
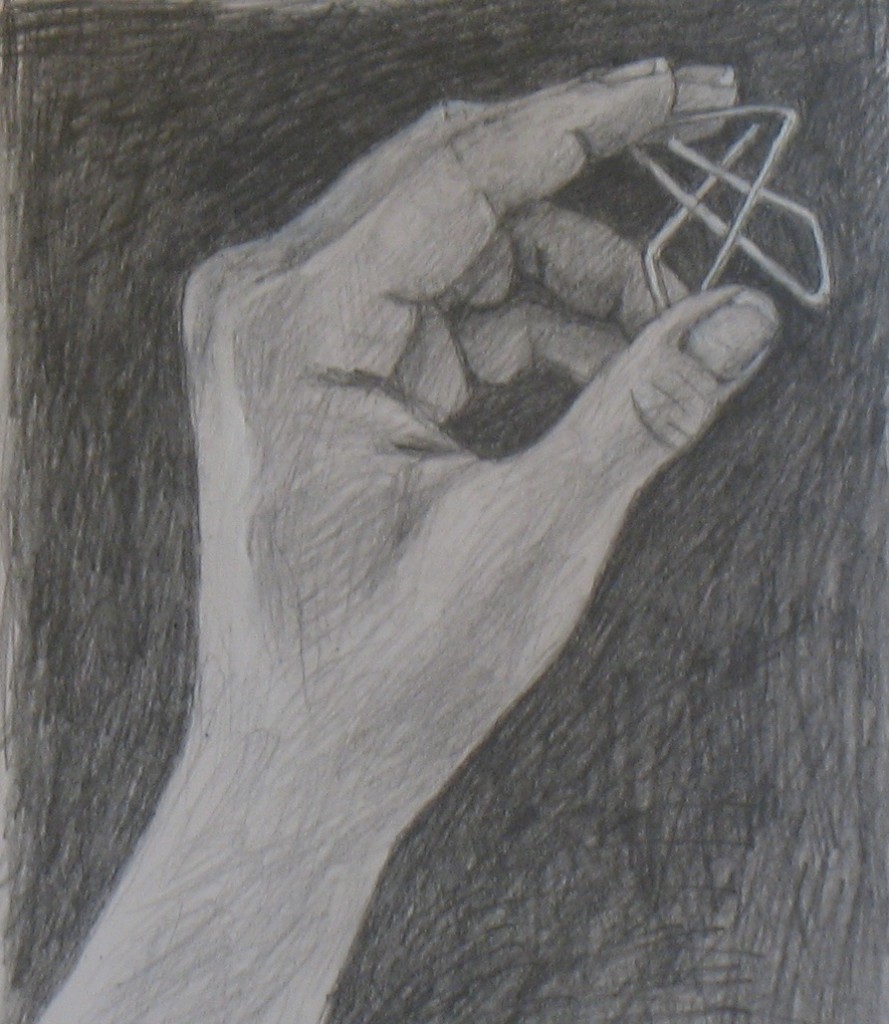
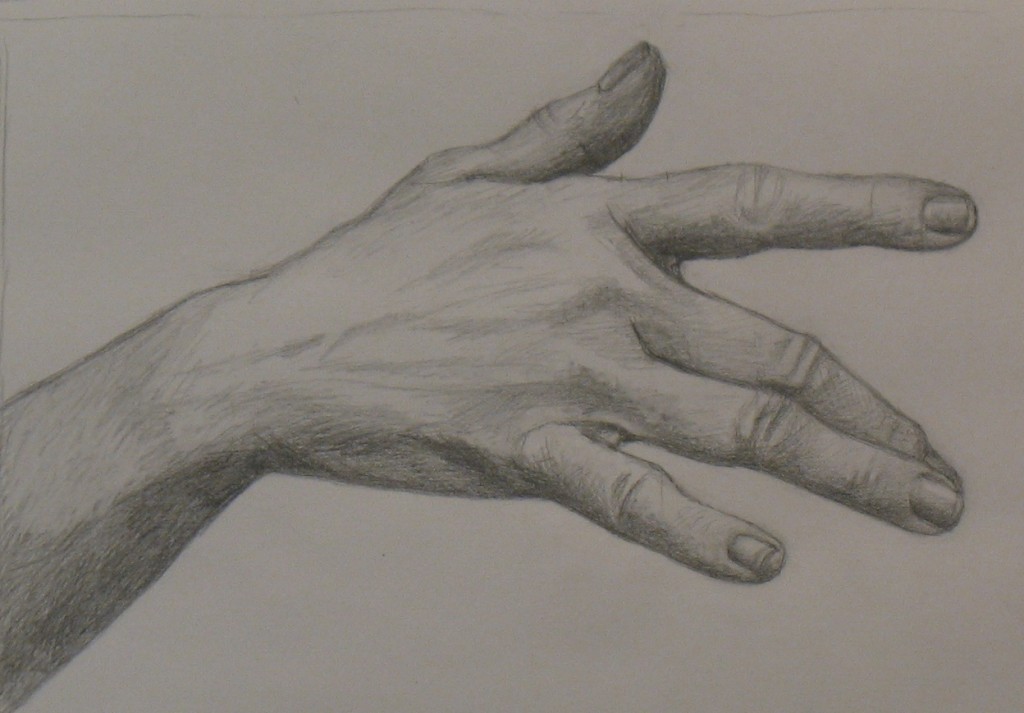
Hand Tutorial 14 Final Drawing


Artists often use grids to help them draw.  A common example is when an artist is re-drawing a small sketch they’ve completed onto a larger canvas or onto a wall for a mural.
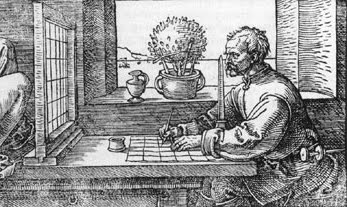
Albrecht Durer's grid. A physical grid made of wood and wires is placed between the artist and the subject he's drawing. He's sketched a corresponding grid on his paper. The vertical instrument in front of his nose is a guide to keep his head in the same position each time he looks through the wire grid, so he always sees the identical view through each grid square.

Grids are so helpful that historically, people have rigged up ways of applying physical grids to the real world when drawing from life.  See the picture to the right for Albrecht Durer’s set-up.  Betty Edwards says dozens of versions of such devices have been recorded in the US Patent Office (New Drawing on the Right Side of the Brain, p. 100).

Why are grids so helpful in drawing?

As I’ve said in previous tutorials: it’s always easier to draw a small, simple shape than to draw a large complex one.  Artists use grids to chop up complex images into small bits that are easier to draw.

In earlier tutorials, I’ve used the concepts of constructing a jigsaw puzzle and seeing with the “right brain” to help you “chop up” your drawing into little easily-drawn pieces,

I haven’t yet talked much about the fact that, while constructing the “jigsaw puzzle,” in my mind’s eye, I’m applying an imaginary grid to help me draw the pieces in their proper places, sizes, and shapes.  More accurately, I’m imagining bits of a grid only where and when I need them.

What is a “custom grid?”

What do I mean by drawing “a grid where and when I need” it?   I mean that each time I’m about to draw a new line in my sketch, I run my eye over other lines I’ve drawn, to see which might end or begin at the same level as the bit I’m about to draw, and so serve as a compass to guide me.  I look to see whether the hand-part I’m about to draw is, for example, at the same level as the middle of the joint on the finger I’ve just drawn.  Or which previous hand-part is directly above or beneath the bit I’m sketching next.

In my drawing for this tutorial, I’ve actually sketched many of the lines I usually just envision in my mind.  You’ll see that this technique helps me build up an imaginary web of lines and reference points that enable me to pinpoint where each new line of the hand should be drawn.  I don’t put a wire grid between me and my hand, nor do I pencil an entire grid on my paper.  But the effect is close to the same.  I’m imagining the pieces of a grid that I need at any given moment.

The video at the end of this post will demonstrate how I do this.

Tutorial 14 Hand Pose

This is the first tutorial in which we’re drawing our hands from the standpoint of some one facing us, instead of from our own viewpoint.  In my last post, I showed how to take photos to use for these poses if you have to do it entirely on your own.  If you haven’t taken photos that will work for this tutorial – or don’t have some one willing to pose for you – please go back to see how to do this.  Try to replicate roughly the same pose as the one above for your own drawing.

First hand tutorial pose "A Simple Drawing of the Hand"

Since this is the first drawing from “the outside,” I’m using the simplest pose of the group of photos I took in Tutorial 13.  This pose mirrors the simple pose from our own vantage point which began this series of hand tutorials.

Natural subtleties in photos

Interestingly, we’re adding one small complexity in this pose compared to that very first one, in which our hand rested on a table (see right).  All the fingers in the first tutorial relaxed onto the surface of the table, so all were supported in the same plane.

In Pose 14, though, I held my hand in the air as I took a photo.  As a result, my pinky was poised at a different angle than the rest of my fingers.  So I was drawing it from a slightly foreshortened perspective.

This hand pose looks relaxed and natural in a way many of the ones I’ve drawn from life don’t.  This is because it’s not easy to hold a relaxed pose for a long time while you draw (in addition to which I have to keep reaching around the tripod to take photos of my drawing in action).  It’s really tough to hold your hand in the air in a natural position for very long, so it’s easier to draw the hand resting on a table.  But that really limits the number of poses available to you.

What I love about working from photos is you can freeze fleeting poses that in life couldn’t be held naturally for very long (this is why life drawing teaches you to draw incredibly quickly, sometimes in 10-second or 30-second poses).

Work materials and set up

Refer back to the relevant sections of this tutorial for your work materials and set up.  When drawing from photos, use the vertical set up.  Drawing with your paper vertical always gives you a better angle; the only reason we’ve used a table in the past is as a place to rest the hand when drawing from life.

Be sure you’re seeing see both your drawing and your model straight on!  If you’re seeing either from an angle, shift your setup until you’re seeing them properly.

Stand up while you’re drawing!

Whatever your setup is, it’s always best to stand up while you’re drawing so you can move back and forth to see your work from different distances as it progresses.

Standing up also helps you see both your model and your drawing straight on.  When you sit down, you’re almost always seeing your drawing at a slant.  This will distort your work.  You’ll end up being very upset if you’ve produced something that looks gorgeous from your sitting position, but is skewed when you look at it from any other angle (e. g., when you display it on your wall).

Hand Tutorial #14 video

As you watch the video below, notice the guidelines I’m constantly sketching in.  (I usually don’t actually draw most of these guidelines; I simply picture them in my mind.)

{"numImgs":"58","constrain":"height","cvalue":"450","shellcss":"width:609px;padding:4px;margin:14px auto 0;"}

All of the vertical and horizontal lines I make are like a standard grid.  But early on, before I have many lines done that I can use for reference, I often begin by looking for triangular shapes at the top of the hand.  (The beginning of any drawing is always the most difficult part, because you have no anchors created yet.)  So at first my “grid” contains more slanted lines than straight ones.

Late in the drawing, I erase the guidelines.  By this point, I usually have the hand completely sketched in, so I can now see its parts in small enough pieces to continue without needing guidelines.

At one point (by Frame 24), you’ll see that I realized I’d made a mistake in my judgment of grids and shapes.  This happens all the time!  Don’t let it upset you.  Just correct your error and keep moving forward.
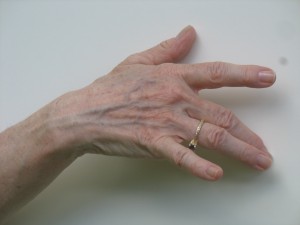
My hand in Tutorial 14 pose.

I realized in Frame 24 that I’d made a mistake somewhere because that pinky was going to be very fat!  I didn’t know right away where my error was – on the pinky side of the hand or the forefinger or where.  As always, I believe in continuing to move forward sketching other areas, in order to help orient myself to figure out where my mistake happened.

By Frame 37, I’ve decided I’ve placed my middle finger too high (in negative-space terms, I haven’t made the negative space between pointer and middle finger a wide enough triangle).  I corrected that, making a big erasure in Frame 39, and moved on to finish the drawing.

How did I figure out where I made my error?  In Frame 35, I drew in the bottom line of the pinky.  This line intersected the hand in a place that would have shaped the hand incorrectly.  I was going to have to do major surgery on my drawing!  In Frame 36, I used the shadow along the bottom of my hand to judge the proper placement of all the hand parts, then moved ahead with the surgery in Frames 37-42.

Have fun drawing!
Hand Drawing Tutorial #13: Models for the hand’s “other side”

Friday, May 27th, 2011

…my hand tutorials are designed to enable you to learn to draw by practicing on your own if need be.

(Earlier hand drawing tutorials are here.)

So far, all the poses in my drawing tutorials have been of  hands viewed from one angle – our own eyes.  We’ve been limited to this single vantage point because our drawings have been of our own hands mostly from life.

But what about drawing the hand as seen through others’ eyes as they face us?  You often need to draw hands as another person would see them.

Of course if you’re lucky enough to have some one willing to pose frequently for you, you can draw from any angles you (and they) choose.  But my hand tutorials are designed to enable you to learn to draw by practicing on your own if need be.

Your hand from others’ viewpoint

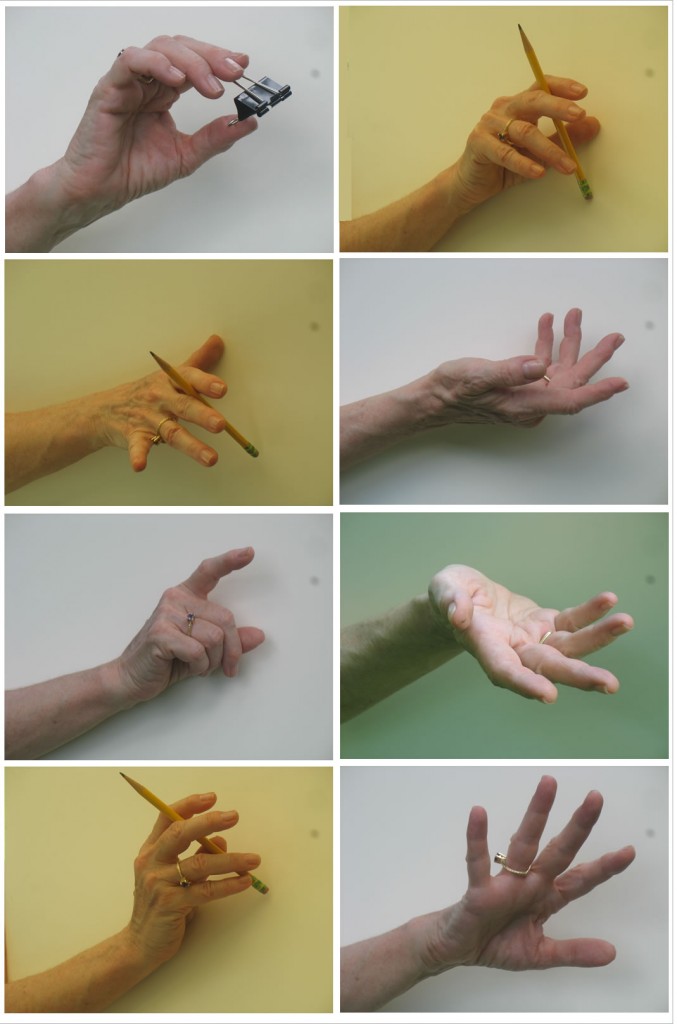
Look at the photos I took of my hand below.  Is it physically possible for you to see your own live hand in these positions from this viewpoint?  Try mimicking a few to find out.  Of course, you can see all of them from the opposite side: from your own eyes’ perspective. 

My hand photographed with camera facing me. (I used my right hand because of the ugly damaged nail on my left hand, as seen in earlier posts.)

You’ll find it’s next to impossible to comfortably see your own hand in any of these positions from the perspective shown here.  You may approximate it by twisting your arm around painfully.  But you won’t be able to hold the position long enough to draw it.

What’s the difference between your perspective of your hand and others’ perspective?

One element that characterizes the photos above is that my pinky appears foremost (except when my hand is palm up), while my thumb appears at the back of my hand.  This is different from every tutorial hand pose we’ve sketched up to now.

Well, what the heck’s the difference, you might ask?  Pinky forward, thumb forward, who cares?  But if you see a drawing of a person whose hands’ thumb and pinky sides are reversed, it’s immediately recognizable as a bizarrely unnatural mistake.  It looks like the hands were attached to the arms backward.

Thumbs will rarely be hidden by other fingers as you view your live hand from your own vantage point (unless you’ve intentionally tucked it away).  Conversely, from the vantage point of others, the pinky will often be prominent, and the thumb will often be blocked by other fingers appearing in front of it.

So when we want to draw our own hand from the vantage point of another person, we have no other choice but to work from photographs – unless some one is willing to pose for us as often as we want to sketch.

If you have the benefit of a person who will pose for you, grab it!  You need to know how to draw from life and should do it whenever you can.  And if some one will just let you take photos of their hands, go for it.  But short of that, you’ll need to find a way of taking photos of your own hand with the camera lens facing toward you instead of away from you.
How to take drawable photos of your hand from others’ viewpoint

I took all the photos above outdoors, mostly in the shade (the color differences come from my experimenting with several locations, e. g. under a translucent roof).  I set my camera on a tripod facing me.  If you don’t have a tripod, set your camera on a stack of books on a table, or some sturdy equivalent.

Because I’m using these photos for tutorials online, I wanted a plain, uniform background.  So I held a piece of foam board against my chest in back of my hand.  This created a background clearly differentiated from the hand.  Drawbacks were:

  • the foam board was very awkward to hold while I was simultaneously trying to keep my hand/arm in natural positions and reach over to the camera to snap the photo.
  • the white board cast a reflection upward onto my hand, producing highlight patterns not ideal for basic drawing tutorials.

So you may want to just wear a plain t-shirt, ideally not too white/bright, to give you a relatively plain background for your hand.

If your camera has a viewer that can be flipped around to be seen by some one standing in front of the lens, you should of course flip it.  This way, you’ll be able to see whether your hand pose is a good one and whether your hand is filling but not going outside the frame.

A crucial step

It’s very important to set your camera on zoom if that’s available, and to move far enough away from the lens to fit your whole hand in the picture.  This will prevent distortion from standing close to the lens, which makes the closest parts of your hand appear abnormally large.

Standing farther from the camera will create another challenge: reaching way over to the camera to click the shoot button – unless of course you have some gizmo that lets you shoot at a distance.  (My ignorance about photography is evident here.  But my goal is not great photography.  My goal is to get good enough images to use as models for drawing.)

Necessity is the mother of invention

So, minus the aforementioned gizmo, I needed to concoct some device to snap photos while I stood far enough back from the zoomed lens to fit my whole hand in the picture frame.  The device had to reach a good distance horizontally, then arch down to press the camera button.

Taping together an odd assortment of a broken handsaw and other items did the trick (I later taped a piece of paper towel to the business end of my tool to make it slip less when pressing the metal camera button).

A photo of my contraption is below.  I’m showing it to you not because it’s beautiful or elegant, but because it got the job done and allowed me to move forward with my drawing plan.  I want to encourage resourcefulness in anyone using these tutorials.  If you don’t have the right equipment, try to invent ways to move ahead anyway.  Keep moving forward even if a given step along your way isn’t perfect.

Necessity was the mother of my invention of this crazy looking but effective too.  Tape is green.

Getting back to actual drawing

My next post will be a drawing tutorial of one of the hand positions above (is there a particular one you’d like me to do first?  If so, let me know).  In the meantime, you may want to experiment with taking photos of your own hand with the camera lens facing toward you.

Alternatively, find some one who will pose for you to either draw or take photos!


Hand Drawing Tutorial #12, Part 2: Making a Pencil Look 3D

Monday, May 2nd, 2011

This is Part 2 of Tutorial #12.  If you haven’t already, please go through Part 1 first.

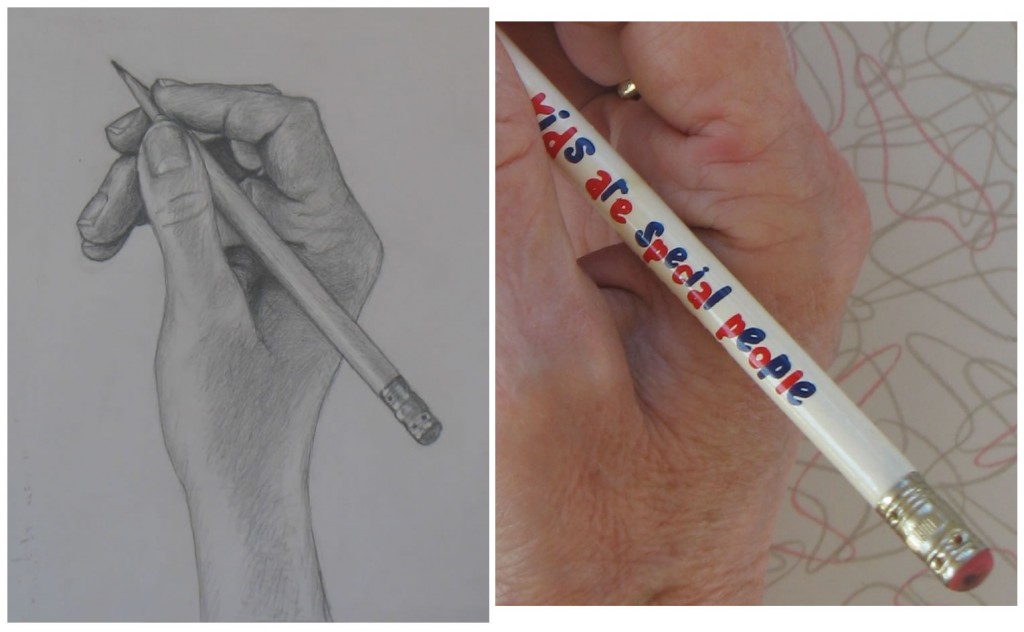
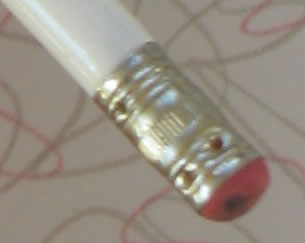
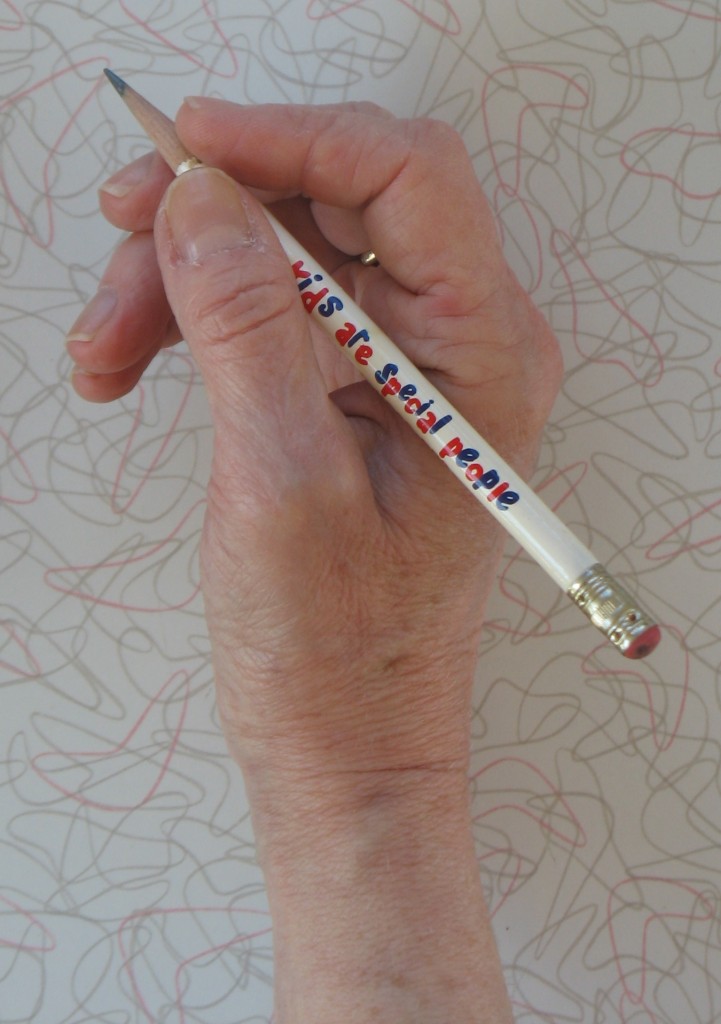
Left: Tutorial #12 hand pose. Right: Closeup of pencil held in this pose.

Shading the pencil in this hand pose is another opportunity to help your vision shift over to “right brain” mode.  If you can accurately locate the highlights and shadows in the pencil – including in that shiny metal holder on the eraser – you will be able to draw it realistically.

Shading the pencil so it looks 3-dimensional

Take a few minutes to really look at the pencil in the closeup above.  What gives the pencil a three-dimensional appearance?  First, notice the long highlight up the length of the wooden part of the pencil.  Is it narrow or wide?  Does it extend the full length of the pencil or only part way?  Does it run up the center of the pencil, or more toward one side?

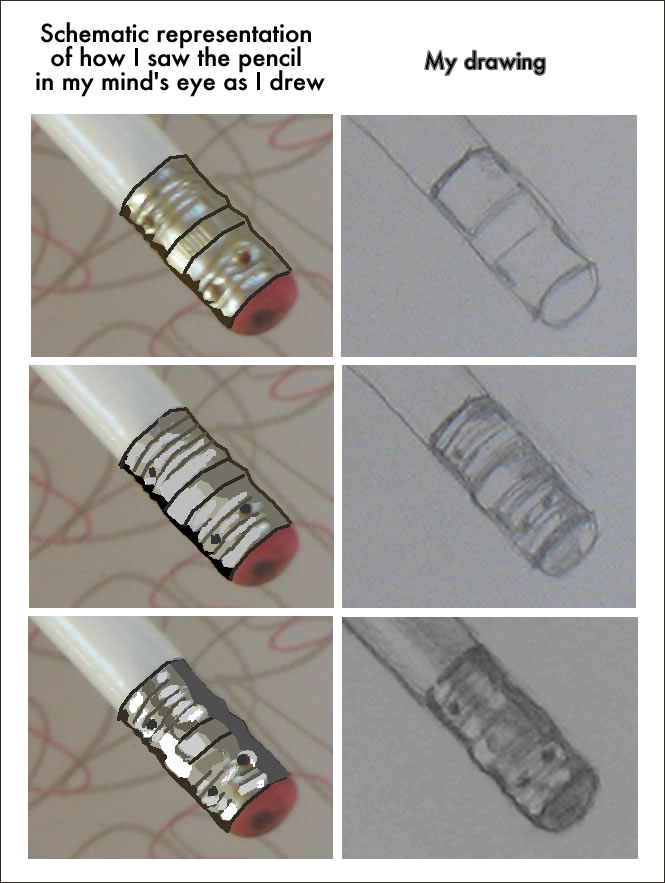
As for the metal eraser holder, let’s break down what appears complex into simple shapes.  Squint your eyes really hard at the eraser photo (left) to help you identify the highlights and shadows of the metal.   What are the brightest highlights?  What are the darkest darks?  What are the basic subdivisions of the metal piece?

Below is a schematic of how I was seeing the pencil eraser (in “right-brain mode”) while I was drawing.  In the top left image below, I’ve placed lines on the photo of the pencil eraser demonstrating how I first drew its basic subdivisions.

Left: "Right-mode" view of eraser. Right: My drawing

If you can train yourself to see complex forms as simple component parts, you’ll be able to draw them easily.

Video of part of shading process for Hand Drawing Tutorial #12

To see the initial drawing phase of this hand pose, please see Part 1.

At the end of this drawing (Frame 21), I used white acrylic paint, applied with a very small brush, to intensify highlights particularly in the metal eraser holder.

{"numImgs":"21","constrain":"height","cvalue":"450","shellcss":"width:342px;padding:4px;margin:14px auto 0;"}

Hand Drawing Tutorial #12: Holding a Pencil

Saturday, April 16th, 2011

All of my drawing tutorials are based on two fundamentals:

1)  It’s always easier to draw a small, simple, flat shape than to draw a large or complicated one.

2)  Learning to see in “right-brain” mode enables to see your subject as a series of small, simple, flat shapes that all fit together.

Put these two concepts together, and you may envision something like a jigsaw puzzle….

Hand drawing #12: holding a pencil

Note: If you’re beginning these drawing tutorials for the first time, you may want to start with an earlier one – the first is here for example; the third here – and move forward from there.

Hand pose #12: Holding a pencil

For me, knowing how to draw is above all knowing how to see in what Betty Edwards called “right-mode,” or with the “right brain.”  So I’m always trying to think through what might show you how to see in this way.  If you learn how, it will help you draw easily.

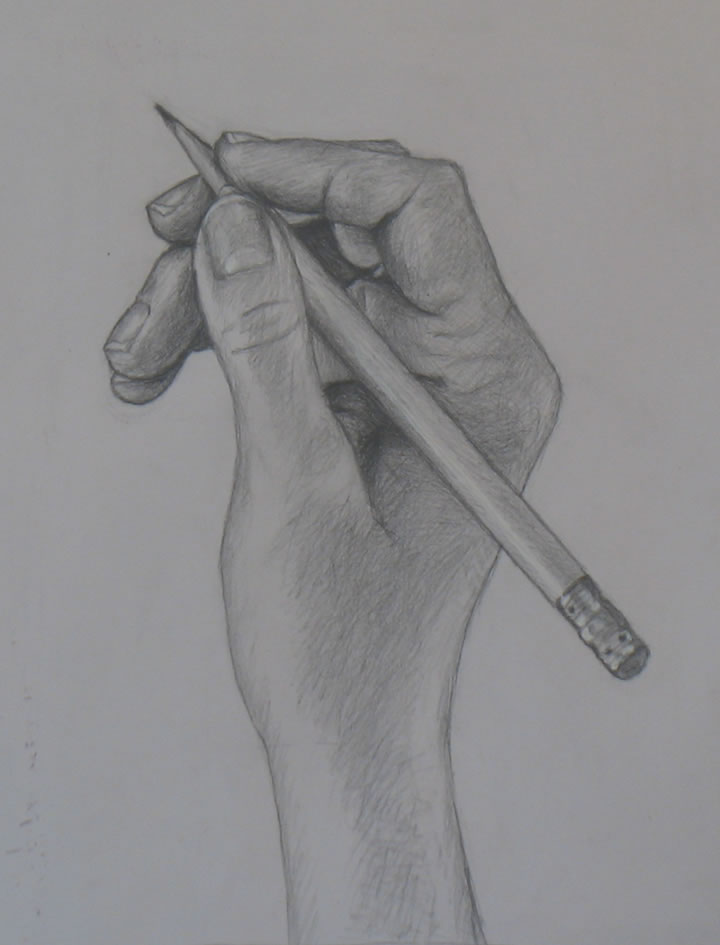
As I was drawing this tutorial’s hand pose, I made a special effort to actually sketch in many of the guidelines I usually envision mostly in my head.  I hope this will help you see this hand pose as a series of easily-drawn, small, simple shapes.

Unlike many drawing instructors, when I say “simple shapes,” I don’t mean cones and cylinders.  That is, I’m not talking about volume. In my own experience, seeing objects as flat forms, like jigsaw puzzles, is much more helpful than seeing in terms of volumes.

After all, you’re drawing on a flat surface.  You’re not sculpting in three dimensions.  So it makes sense that you will be most successful if you can see what you’re sketching as a series of flat shapes.

As you’re drawing, think of shapes that make up a jigsaw puzzle whose pieces all need to be drawn accurately in order to fit together snugly.  If you form each little piece correctly, and fit it properly into its neighbors, you’ll find that your drawing is a realistic representation of your subject.

Tutorial 12 hand pose: holding a pencil

Earlier posts, here and here, have presented colored-puzzle videos of my jigsaw puzzle concept.  You may want to look at those before or after you go through the video below.

Which type of video helps you more?  Or are they both equally useful in your learning to draw?  Leave a comment below or email me to let me know.

Set up and work materials

Please see the relevant sections of this tutorial.

While most of my hand tutorials have been drawn from life (that is, my actual hand), this week I worked from a photograph of my hand.  I did this partly because I wanted to sketch my hand holding one of its most typical tools, a pencil.  I couldn’t hold a pencil in a natural way in my right hand while also sketching it!

I used the vertical setup, with the photo on a computer screen next to my easel.  If you try this, be careful that you can see both the photo and your drawing straight on, so your drawing won’t be thrown off by some odd perspective.

Hand tutorial #12 video Part 1: initial outline

There is a written commentary below the video, keyed to each frame by number.  You may want to open this post in two windows on your monitor so you can follow the commentary along with the video.

{"numImgs":"33","constrain":"height","cvalue":"450","shellcss":"width:356px;padding:4px;margin:14px auto 0;"}

Frame 1: I sketched in boundary lines along the left side and top of the paper. which enabled me to…

Frame 2: …draw a small rectangle in the upper left corner whose lower point would be the pencil tip.  A diagonal line then formed the pencil’s sharpened top.  To sketch the pencil at the correct angle, I envisioned where it would intersect my border-line if the line of the pencil were extended (I did extend it as a guideline, to be erased later on) .

Frame 3-4: Several triangles – formed partly by imaginary guidelines – told me where to draw bits of edges of finger tips and pencil top.  In Frame 4 I corrected the triangles I’d sketched in Frame 3.  Note that I’m using negative space here – the space around the hand and pencil, rather than the objects themselves.  “Pieces” of negative space are important parts of the jigsaw puzzle.  If you don’t yet know what negative space is, please look back at this tutorial.

Frame 5: I continued the process of envisioning the jigsaw pieces: the fingertip just below the pencil point, for example, had a curved bottom, two straighter sides, and a straight “top.”  This is an example of how important it is to envision the shapes you’re drawing as flat bits.  If I had been thinking about how to draw the 3-dimensional volume of fingers, I would have had a much harder time.  Instead, I easily drew a small, seemingly “flat” shape.

Frame 6-7: I continued the same jigsaw-building process.

Frame 8: In order to properly represent the long sweep of the lower hand, I needed to eyeball over a larger space.  I could see that the edge of the base of the thumb was beneath the middle of the forefinger tip I’d already sketched.  So I lightly sketched a vertical guideline.  I made a horizontal guideline from the bottom of the pinky rightward, to help me see where the most rightward curve of the thumb base should be marked.

Frames 9-11: I’ve said it before and I’ll say it again: fingernails make great measuring devices that you can use to check the accuracy of other bits you’ve already sketched.

Frames 12-14: I formed the side of the thumb and a bit of the fingers next to the pencil from simple, small shapes.  Can you identify these jigsaw shapes in the photo above?

Frames 15-16: I darkened the interior shape I’d just sketched, helping me see it more clearly to be sure it was exact.  This jigsaw piece is very distinctive and is at the core of the series of bits around it.  So drawing it precisely would help me with the rest of the hand.

Frame 17: Knuckle and palm wrinkles make fabulously helpful measuring devices and guidelines.  Here I used the thumb knuckle wrinkle to form a bridge to check the accuracy of lines I had drawn on either side of it.  The thumb cuticle also helped me refine the whole thumbnail outline.

Frames 18-20: Now that I had the lines on either side of the thumb placed pretty well, I could begin the neighboring triangles that form the palm and – via their negative space – the pencil edge.  Note that I used a palm wrinkle as a side for triangles.

Frames 21-22: The forefinger is made up of three jigsaw pieces.  Our image of fingers may be that they’re made up of three almost identical rectangles.  But look carefully at your pointer in this pose.  It’s made up of three shapes that are quite different from each other in size and shape.  Draw each of them right, and you’ll have the entire pointer in a pose immediately recognizable as realistic.  (My pointer in this pose has a short middle section and a seemingly-fat bottom section.)

Frame 23: Now that I have more drawn, I’m able to correct some palm lines.

Frames 24-26: I used a series of guidelines to form the right side of the hand, which helped me capture the knuckle-triangle properly.  I also used a very flat negative-space triangle, whose longest side was a guideline I drew from pointer joint to knuckle.

Frames 27-29: I used a series of vertical “plumb lines” to help me locate the correct placement for the bottom of the hand and the wrist.  I was also keeping an eye on the negative-space angle (imaginary triangle) formed by the pencil’s lower line and the wrist.

Frame 30: I began shading the distinctive palm-triangle under the pencil.

Frame 31: I erased a lot of my guidelines because when I’m no longer using them, they can become distracting.

Frame 32: I refined the thumb line and checked the picky using a negative-space triangle with the ring finger.

Frame 33: As I transitioned to the shading phase of the drawing, I began working on the distinctive dark areas of the palm.

I eventually drew the missing fingernails as I was shading the drawing.  We’ll take up that phase in the next post.

Hand Drawing Tutorial #11 Part 2: How to Draw Shininess

Wednesday, April 6th, 2011

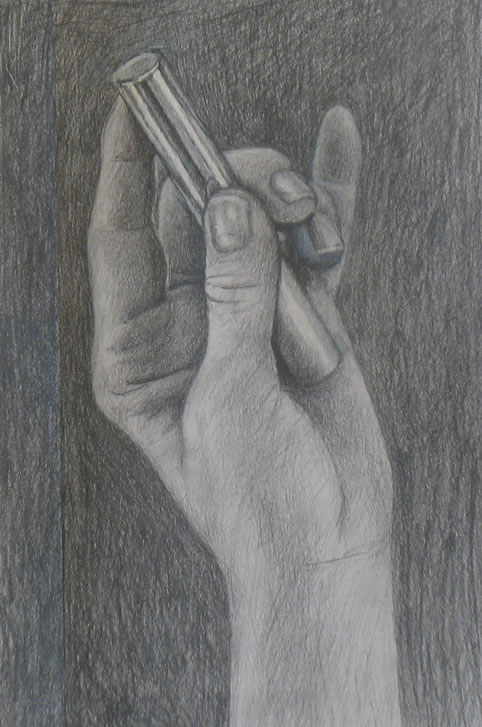
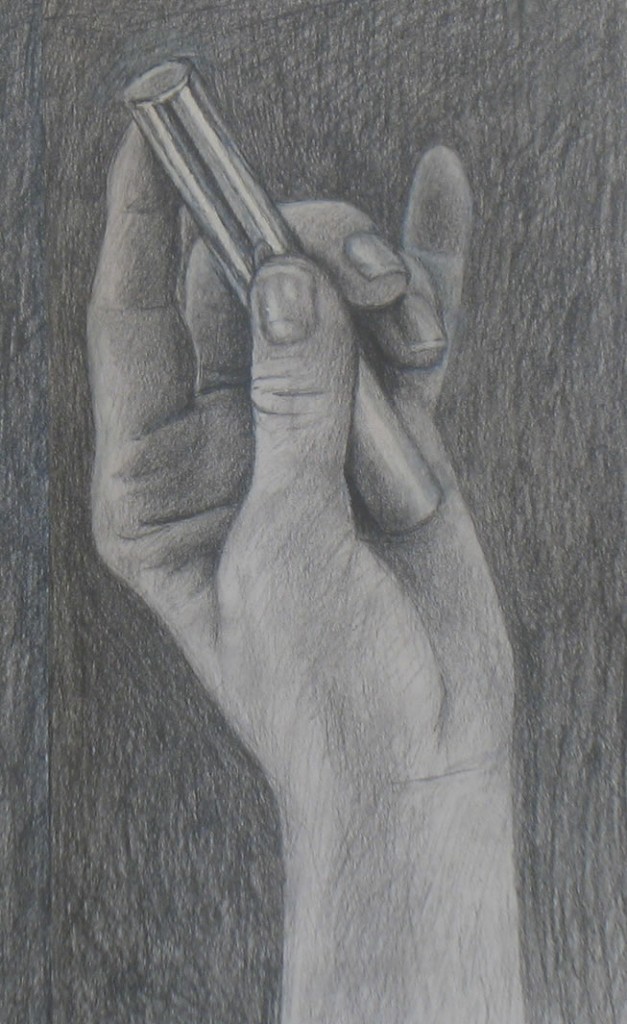
Hand Pose #11 with Shiny Tube

If you haven’t already gone through Part 1 of this tutorial, please do that now.  It introduces the subject of how to draw a shiny object.  And its video shows this hand drawing in its initial outline-sketch phase.

The video below, at the end of this post, follows the drawing through creating the shiny look of the lipstick tube.

How to draw shine

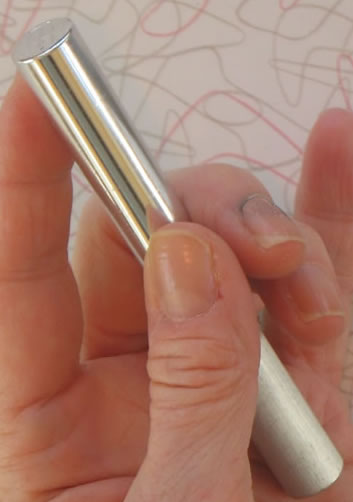
Part 1 of Hand Tutorial #11 discussed how to look at the shiny tube as a jigsaw puzzle of stripes.  When you view the tube globally as “a shiny lipstick,” the tendency is to freak out: “I can’t draw that, it’s shiny!  How can you make a pencil drawing look shiny?”

In fact, it’s simple.  You need to shift the way you’re viewing the tube to “right-brained” mode.  In right mode, you see that visually the shiny tube is made up of easily-drawn “jigsaw” pieces, most of which are shaped a lot like stripes.

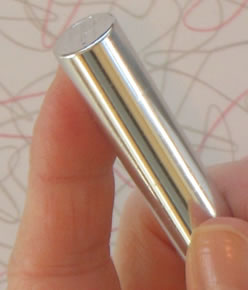
Tube with one shiny end and one dull end (and for once, my blue fingernail somewhat photoshopped out)

If you replicate these “stripes” in your drawing, you’ll find that your pencil will magically create shininess.

Video: drawing the shiny tube

To make your tube look really shiny, it’s important to draw the “stripes” and other reflection-shapes accurately.  To do this, I began (Frame 6 of the video below) by bisecting my sketched tube, following the dark line that happens to run down its length almost in its center.  I then divided up each half of the tube, duplicating the width of each “stripe” (Frames 7-8).

Because this sketch is in black and white, I had to represent the shiny tube’s dull green and beige (discussed above) in shades of gray (I began in Frames 9-10).  Your shiny object will probably also reflect colors.  To figure out what shade of gray should represent each color, squint your eyes hard.  The colors will begin to disappear and it will be much easier to see the relative values of the colors you will represent in shades of gray.

In Part 1 of this tutorial, we discussed the shading of the other end of the tube, which is much duller.  You can capture this quality by shading it as it appears: it’s shading is even and gradual, in contrast to the highly-varied stripes of the shiny end.  I began this process in Frame 11 and kept perfecting it later (e. g. Frames 14-15).

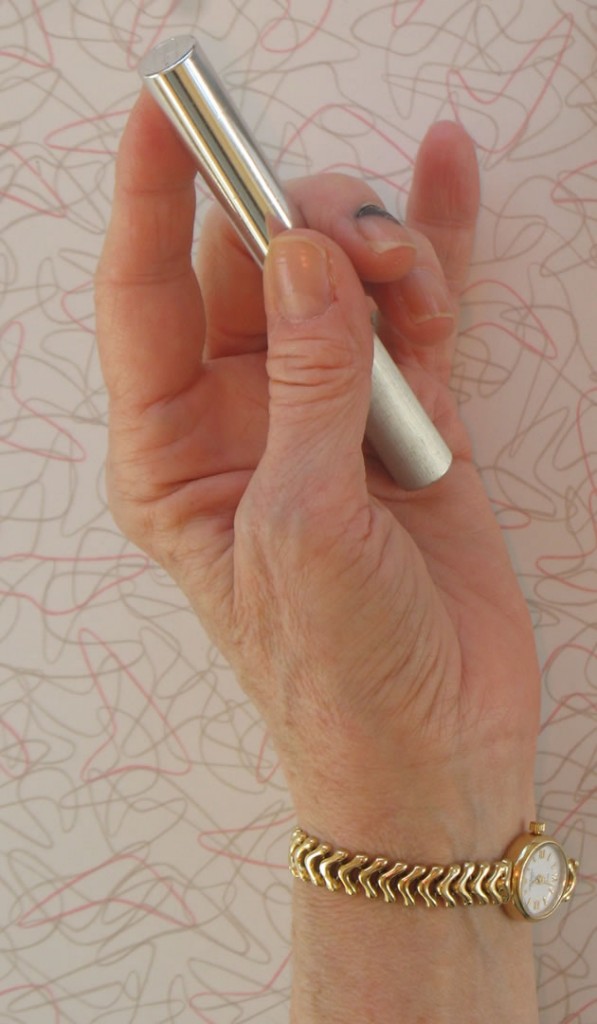
Photo of hand pose for Tutorial #11.

In any drawing, how you shade everything around a shiny object will affect how the shininess is perceived.  In my drawing, I kept perfecting the shading, in particular of the fingers close to the lipstick.

And notice how much lighter the highlights on the shiny part of the tube are than any other “jigsaw piece” in the entire hand pose (see photo right).  To make your drawing look very realistic, if you’re using white paper, you can darken every other area of the paper (this is why artists often begin paintings by putting a medium-toned wash over their entire canvas: so that the highlights will look strikingly bright against this background).  I began doing this around Frame 17 and continued through the end of the sketch.

Around Frame 19, I used white acrylic paint and a small brush to lighten the bright highlights on the shiny end of the tube (I also used it on the fingernail tips and in a couple of other spots that became smudged with pencil and were difficult to lighten with my eraser alone).

By the way, though I didn’t draw my watch, it has a shiny texture that you can study visually.  If you were going to take the time to draw all those little links, you would follow exactly the same process as we have with the relatively simple shiny lipstick tube.

Technical note:  This video is even jumpier than usual because of some difficulties with my tripod (accidentally knocking it a few times, etc).  As a result, there appear to be changes in the overall size of the drawing and its perspective.  These changes didn’t actually occur in my drawing.  You may find this video most useful if you focus only on the lipstick tube itself during the frames when I’m working on that.

{"numImgs":"23","constrain":"height","cvalue":"420","shellcss":"width:257px;padding:4px;margin:14px auto 0;"}

Hand Drawing Tutorial #11: Zen and the Art of Racquetball

Monday, March 28th, 2011

This is an advanced tutorial.  If you’re just beginning, please start with earlier lessons such as A Simple Drawing of the Hand and work your way forward.

I played racquetball last weekend for the first time in many months. I was surprised to find that my playing level hadn’t fallen off despite my lack of court-time. If anything, I’d improved.

Here’s what I think helped me: I hadn’t been hitting racquet balls in months, but I had been drawing constantly.

Hand pose, Tutorial #11

When I’m drawing, my utter focus on each “jigsaw piece” is a lot like the utter focus on the ball in racket sports. In both, you need to get into a zen-like state of total concentration on one small bit of your visual environment.  Your hand/arms/legs then know automatically what to do to sketch that bit or smack that ball.

I don’t want to make grandiose claims here. But I suspect that learning to see in order to draw may improve your sports skills as well – at least in sports that involve connecting with a fast-moving ball.

And maybe this underlines the fact that learning to draw is all about learning to see. To me, the most important part of learning to draw isn’t acquiring knowledge about proportions, perspective, or how to draw this or that.  It’s about training yourself to focus on and see what’s right in front of you.

Hand pose with shiny tube

Tutorial #11 hand pose with shiny tube

The object I chose for this hand pose is a metal tube.  It’s actually a lipstick, but I chose it because one end of it is very shiny, and the other end dull.  I think this combination – a simple shape with a very shiny surface – may help you learn to see in the highly focused way you need to draw (and maybe to play sports).

I could have just drawn the tube without the hand for this tutorial.  But for whatever reason, I’m not happy drawing only inanimate objects.  For me to enjoy what I’m doing, I need a person (or part thereof) connected with the object.

But if you’re able to find some kind of shiny tube, you might try first drawing just that, without your hand.

If you can’t find a shiny tube, experiment with drawing from the image of my hand on your computer screen.  Or try just the close-ups of the lipstick tube, below.  (See relevant sections of this post for materials and work setup.)

How does an artist make a shiny surface look shiny?

Ahh, here’s where seeing comes in.  What do you see when you look at that tube not as a “shiny tube,” but as a piece of a 2-D jigsaw puzzle?  Can you see that it’s made up largely of a series of stripes of white, gray, dull green, beige, and other colors?

There’s also the reflection of my thumb in one spot just above my real thumb.  And toward the sides of the tube, the stripes aren’t absolutely parallel the way they are in its front/center.

If you replicate these and other details in your drawing, your tube will look shiny.

By the way, I’m always tempted to photoshop out my smashed blue fingernail, but I don’t because I want you to be able to see the natural texture of the nail.  Nails are also shiny, though less so than the tube – you can see it most clearly on my thumb.  If you draw that semi-shininess, it will make your drawing look realistic.

Look at the contrast between the shiny end of the tube and the other, duller end (right).

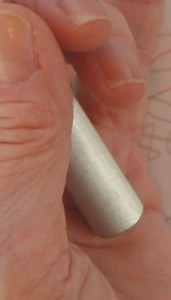
Dull end of tube - notice how the shading here is gradual from left to right, not in distinct stripes as with the shiny end of the tube.

Here, the shading fades very gradually from dark on the left side to light on the right.  If you replicate that gradual shading – along with the bit of white highlight that begins right beneath my thumb – this end of your tube will look like dull metal and will not look shiny.

Why does my jigsaw approach to drawing work?

When you’re drawing, you are representing the 3-dimensional world on a flat surface.  So you need to learn to perceive the 3-D world in two dimensions.  Imagining this process as building a jigsaw puzzle can help you because puzzles are exactly this: representations of the 3-D world on flat cardboard.

Video demo #11

The video below shows how I drew my hand pose holding a lipstick tube. Part 2 of the video, showing the shading that creates the shiny look of the tube, will be in my next post.

For now, watch how I built the jigsaw puzzle of this hand pose.  (If you haven’t already watched my jigsaw videos here and here, please do it now in order to understand what’s going on in my mind as I draw.)

In this lipstick-tube pose, I kept refining each jigsaw piece as I went along.  I often didn’t get the size and shape perfectly on the first try.  But as always, the more shapes I drew, the more reference points I had to judge how to correct ones I’d already drawn.  Even after I began shading (see video next post), I continued to improve basic shapes and sizes of fingers, joints, and nails.

Notice how wrinkles and finger joints make great sub-units that help you judge and measure your shapes.  Periodically, I drew guidelines (later erased) from an already-sketched jigsaw piece to help me decide where and how to draw another piece.

The nails of the middle and ring fingers were especially difficult to place and draw properly because of their angle.  I just kept at it, though, correcting it little by little.  Sometimes things got worse before they got better!  But eventually I got it right.  If you persist in this way, you’ll get good results, too!

Note that the thumb in this pose appears wider than the right half of the hand because of the angle and position of each..  This is an example of why learning standard body proportions isn’t always that helpful.  When you’re drawing a body part from a direction other than simple and straight on, proportions appear distorted by the perspective you’re viewing it from.

{"numImgs":"56","constrain":"height","cvalue":"420","shellcss":"width:270px;padding:4px;margin:14px auto 0;"}

Come back next post for more on how to create the tube’s shiny surface.

Hand Drawing Tutorial #10 Part 2: Jigsaw Video of Hand with Paper Clip

Thursday, March 17th, 2011

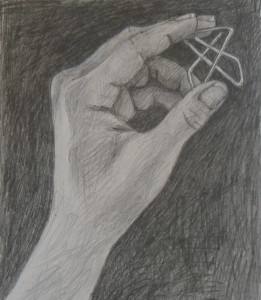
Hand Drawing Tutorial #10 hand pose

It’s always easier to see and draw a small simple shape than a large, complex one.

This is Part 2 of Tutorial #10: Help from a Paper Clip. Part 1 is here.

See the end of this post for a video of this sketch’s “jigsaw puzzle,” which will help you draw this pose – or anything else.

__________

This paper clip pose brings to mind echoes of a teacher – in my early days of drawing lessons – pointing out the need to capture the way the paper clip tucks lightly into thumb and forefinger.  To make this drawing convincing, the teacher would explain, parts of the paper clip must seem to disappear into the fingers holding it.  If you drew every bit of the paper clip, the teacher would tell us, it wouldn’t look like it’s being held.  It would look like the paper clip had been plopped down on top of your drawing of a hand.

What’s distinct about holding a paper clip?

The teacher would also have explained that a hand looks different when holding a light, delicate paper clip than gripping something heavy.  In a hand with a paper clip, muscles don’t bulge, veins don’t pop, nothing is under strain.  Only one finger plus the thumb are needed to support the light weight, so the other three fingers just float into resting positions.

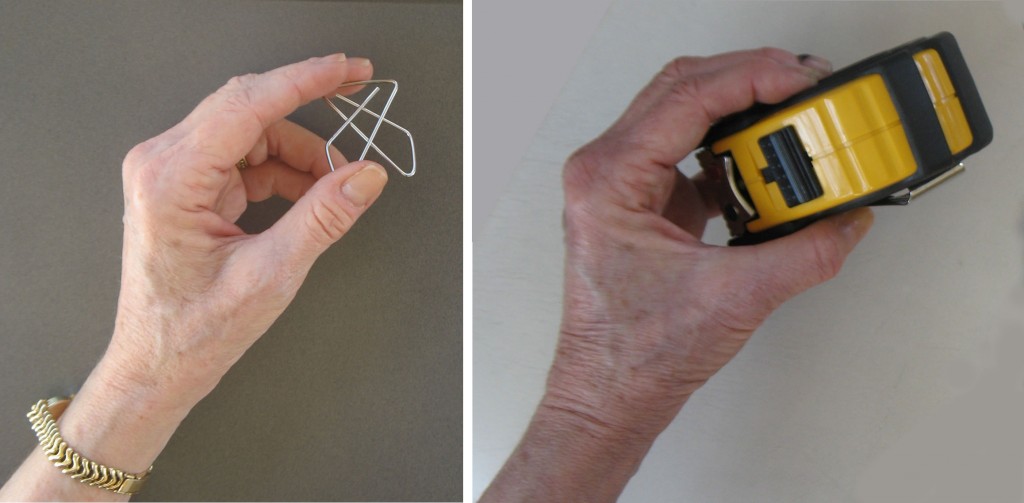
In contrast, see the photo below of my hand with a tape measure.  Here my fingers are working differently to bear the greater weight than when I’m holding the paper clip.  Can you spot some of the differences?

Can you spot the differences in hand and finger position holding a paper clip vs holding a tape measure? How many fingers are needed to support the weight of each object? Is the hand relaxed or tense?

My three largest fingers are all needed to handle the weight of the tape measure.  And the pinky is balancing it from behind.  My thumb is straining awkwardly to do its part.

Meanwhile the hand with the paper clip looks as relaxed as a hand model in an ad for some product.

How do we convincingly draw a hand grasping a paper clip vs a small heavy item?

It can be entertaining and instructive to puzzle through how a hand looks different holding a nearly weightless object vs a heavy one.  I encourage you to constantly observe this kind of visual distinctions in the world around you.  That way you’ll build up your store of visual knowledge, which will unconsciously help improve your drawing.

But when you begin to draw, you need to put those observations on your mind’s back burner in order to focus only on what you’re seeing in your model.  You need to engage your “right-brain” mode function, which apprehends spacial relationships, shapes, colors, and shadows with lightning speed and good accuracy.

Thinking consciously about your knowledge store while you draw instead  engages “left brain” function – the comparatively lumbering, verbal mode of brain work.  Avoid debating knowledge when you’re drawing.

Simply look at the jigsaw puzzle of shapes in front of you.  Figure out their sizes, shapes, and how they fit together – because drawing small, simple shapes is always easier than drawing large or complex ones.  So you need to learn to see your model in small, simple pieces.

Drawing via “right-mode” vision is an easier, more all-purpose way to draw from life than is over-thinking.  With this method, you can draw accurately from life regardless of your subject – whether your hand is gripping a feather or a 100-lb. weight.

How can you reliably engage your right-mode vision?

Earlier posts have described my jigsaw puzzle metaphor for “right-brain” drawing.  My jigsaw metaphor seems to be the most helpful way I’ve found so far of explaining this technique (elsewhere I’ve described it as e. g. an “angle abstraction game.”)  I’ve found myself using game metaphors because when you get into this mode, drawing becomes like a game or puzzle.  You’re making decisions about what to draw with split-second speed, completely non-verbally.  You’re in the zone.

So to me, teaching some one to draw above all means teaching them how to see in right-mode.  Shifting to seeing via this non-standard brain-mode is easy once you “get it,” but sometimes hard before that.  To try another way of helping you make that shift, in this post I’m doing something slightly different for the video.  I’ve started with a photograph of my hand in the Tutorial 10 Paper Clip pose which I drew in my last post‘s video (scroll down that post to watch the video of that drawing, with written commentary keyed to specific frames).

Jigsaw video of this hand pose

Below, on top of the photo of my hand, I’ve superimposed what I was envisioning in my mind’s eye as I was drawing. 

  1. Each black line represents a line I actually drew.
  2. Each colored shape represents a “jigsaw” piece as I saw it in my mind’s eye.
  3. Each chartreuse line is an imaginary or actual guideline for a relationship to other pieces that I was using to check the size and shape of pieces I was drawing.
  4. Each pale gray shape is one that I pictured in my mind’s eye to help me draw something next to it.

Note that I put my puzzle pieces together in an order that made sense to my right-mode vision – that is, shapes that fit together visually regardless of which object they were part of.  I did not focus on completing all the fingers at once for example, or the entire paper clip at one time.  In fact I finished the final shape of the paper clip at almost the end of the drawing.

Does this type of video help you with your drawing?  Email or leave a comment below to let me know what works best for you.

{"numImgs":"47","constrain":"height","cvalue":"420","shellcss":"width:675px;padding:4px;margin:14px auto 0;"}

Learning to draw requires effort and practice.  But it’s also like a game, with potentially satisfying and fun results.

Hand Drawing Tutorial #10: Help from a Paper Clip

Tuesday, March 8th, 2011

Hand pose with paper clip: Tutorial #10

This is an advanced hand pose.  If you’re just beginning these hand drawing tutorials, please start with earlier lessons such as #1 and move forward from there.  Tutorial #3 has images portraying negative spaces; #6 covers left brain/right brain in drawing.  Tutorial #7 introduces my concept of right-brain drawing as  a jigsaw puzzle. Tutorial #9 was the first that incorporated an object into a hand pose.

The jigsaw puzzle of fingers and paper clip

I chose a paper clip as this tutorial’s object.  It turned out to be an ideal case of “right-brain drawing as jigsaw puzzle” (see Tutorial #6).  That’s because this kind of paper clip encloses a whole gaggle of interlocked pieces, so it’s already practically a jigsaw puzzle in itself.

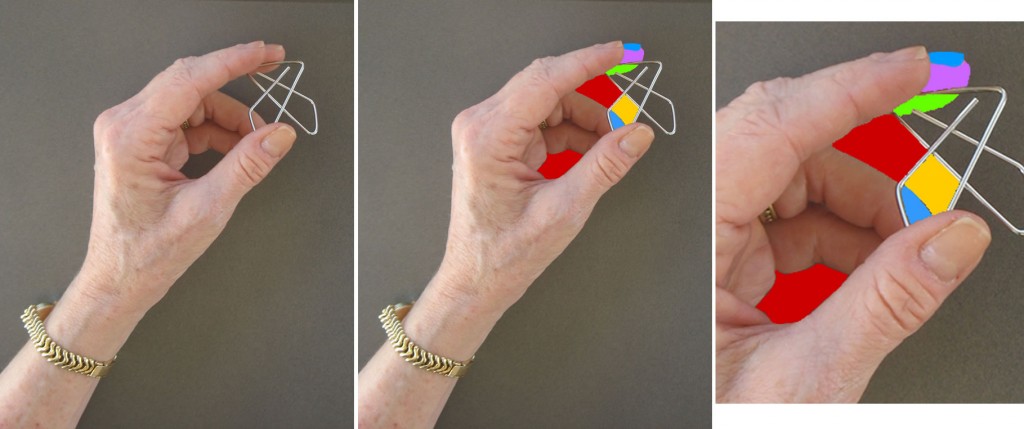
And in this hand pose, the clip abuts and intersects a series of finger bits.  One example is the dark diamond-shape lying on its side between the paper clip, the pointer, and the ring finger (it’s indicated in red in the photo series below).  Getting the shape of this diamond sketched accurately helped me draw the fingers around it.

Another example is the small triangle of the middle finger visible through the paper clip’s bottom left (in blue in the photos below).  Again, drawing this tiny triangle precisely helps you draw all the other shapes around it.

Left: hand pose for Tutorial #10. Middle: Representation of some of the "jigsaw pieces" in and near the paper clip. Right: Enlargment of "jigsaw pieces."

So this “puzzle” was complex.  As I was drawing, each “jigsaw piece” I added made me recheck pieces I had already sketched, adjusting them to fit more accurately together.  This pose required a whole series of modifications to its component bits to get them to fit together properly.

When you look at the time lapse video of my drawing at the end of this post, can you identify my first sketches of the puzzle pieces in the graphic above?  Can you spot my ongoing fine-tuning of all these pieces?  I’ve added commentary below to help you see any tweaks you might miss.

Drawing small shapes is always easier than drawing big ones

A small reminder of why my jigsaw approach to drawing works: it’s always easier to mentally grasp and draw small shapes than big or complex ones.  If you accurately perceive and draw all the small shapes in your subject, fitting them together precisely, you’ll end up with a very good sketch of your entire “puzzle.”

Setting up for your own drawing of your hand with a paper clip

For materials and work space setup, see the relevant sections of Tutorial #1.

Hopefully you’ll be able to find the type of paper clip I used – apparently it’s called an “Ideal Clamp.”  If you can’t find it, use a regular paper clip or any kind you can find.  Hold it in your fingers in a similar pose to mine, and work through your sketch as in the video below, or in any order that makes sense to your eyes and right-mode perception.

Time-lapse video of my drawing

Beneath the video is my written commentary keyed to some of the frames.  You may want to open this post in two windows at once, so you can follow commentary in one as you watch the video in the other.

I’ve been debating whether it’s helpful to readers if I take the time to create a parallel video of the jigsaw pieces I envision as I draw each bit of the hand, as I did in the Tutorial 7 video.  I may do this in my next post.  If it would be helpful to you, please leave a comment below so I’ll know for sure it will be worth my time to do it.

Technical note: The blurry frames are not part of my drawing process – they are bad focus in my photography (as I’ve often said, I’m an artist but not a photographer).

{"numImgs":"45","constrain":"height","cvalue":"450","shellcss":"width:387px;padding:4px;margin:14px auto 0;"}

Frame 1 – As with many of my hand drawings, I began sketching the edge of part of my hand by envisioning imaginary triangles to help me get the angles right (see the Tutorial 7 video for colored diagrams of this type of triangle).  I had already sketched in a horizontal line above the hand which helped me picture the triangles.

Frame 2 – I drew the side of the pointer finger as an undulating line almost paralleling the first edge I’d drawn in Frame 1.  I judged the placement of this line by envisioning it forming more or less a long, thin rectangle with the first edge.

Frame 4 – I completed the pointer, picturing it as a long rectangular shape made up of 3 smaller rectangular segments.  Judging size and shape is always easier for smaller objects, so the smaller rectangles are helpful as measuring devices for the entire finger.

Frame 5 – I adjusted the bottom segment of the pointer when I realized it needed to end closer to the top of the knuckle.  I drew in a horizontal guideline (later erased) to help me judge this.

Frame 7 – I sketched in the first line of the paper clip: the top, which visually bisects the pointer’s tip (green and lavender puzzle pieces in the photos above).  I also drew the roughly-triangular shape which forms the top edge of the ring finger.  I drew a vertical guideline to help me judge where this triangle should end.

Frame 8 – I decided where more paper clip lines should go by picturing them as triangles intersecting the guideline I drew in Frame 7.

Frame 9 – More paper clip lines.  I assessed their placement by their intersection with the ring finger and by the shapes formed with the other clip lines.

Frame 10 – I adjusted the paper clip lines as described in my intro above.

I also drew in the odd little bit of the palm visible in this hand pose.  This palm-shape is a great example of why learning standard proportions doesn’t help much in drawing the myriad positions the hand can fall into.  A general rule of the size of your palm would tell you the palm should be bigger than the fingers.  But not in this pose!

Frame 11 – With so many other lines in this area sketched in, it was easy to figure out roughly where the inside of the thumb should go: it connected the lines I’d already drawn for the ring finger and palm.

Frame 14-16 – I knew that getting that seemingly-dark central puzzle piece set down accurately would help me with everything around it (it forms the pinky and fits into the thumb and palm).  So I fiddled with it in these frames, making a series of tweaks.

Frame 17 – I modified the shape of the thumb.  I also colored in the dark central puzzle piece, which helped ground me in the whole drawing.

Frame 18 – I fine-tuned the lines of the thumb tip and ring finger where they appear to intersect, adding another paper clip line.

Frame 19 – I adjusted two paper clip lines, measuring them in my mind’s eye against everything around them – e. g. I could see the paper clip line shouldn’t touch the thumb-tip, as I’d drawn it, but had to be at a little distance from it.  And I added joint-wrinkles in the fingers, which I always use as measuring devices.

Frame 20 – I drew the thumb nail.  By this time, I was also able to judge where the curved end of the paper clip should fall, so I drew that.

Frame 21 – Here my photography unfortunately got blurry.  Still, I can see that I was firming up the lines of the pointer and middle finger nails.

Frame 22 – I tweaked the lines of the paper clip yet again, now better able to assess their positions compared to all the other shapes around them.

Frame 23 – More paper clip modification!

Frame 24 – Thumb joint wrinkles helped me improve my placement of the edge of the thumb.  Wrinkles are such great measuring devices!

Frame 25 – I began to shade the tips of some fingers.  At this point, I was aware the outside long line of the paper clip was still out of whack, but decided to wait till later to fix it.

Frame 26 – More shading and a slight paper clip adjustment, using the diamond shape (discussed above).

Frame 27 – Began to shade the large expanse between thumb and hand, measuring and judging size and shape the same way as when I was drawing lines.

Frame 28 – I darkened the diamond shape that formed one side of the paper clip.  I had placed my hand against a dark background so the delicate paper clip would be clearly visible.  Now I realized that I was going to have to recreate that dark background in my drawing for the same reason: to make the very thin lines of the paper clip visible.

Frame 29-30 – I darkened more of the negative spaces inside the paper clip, using the darkness to help me check once again whether I had the shapes formed properly.

Frame 31 – I adjusted the shape of the ring finger as noted in intro above.

Frame 32 – I began darkening the background behind the hand.  As I came around to the paper clip, again I fine-tuned it.

Frame 33-36 – more darkening of the background and shading of the hand.

Frame 37 – Corrected the size and shape of the thumb nail and thumb tip.

Frame 38-40 – Continued darkening the background.  Wherever it bordered the hand, I used the darkness to double-check whether I had the line of the hand drawn true to life.

Frame 42 – I used a bit of white acrylic paint to clarify the lines of the paper clip because its delicate shape made it impossible to erase sufficiently.  By now I was pretty confident I had all the clip lines drawn properly.

I continued darkening the background and shading the hand for quite a while beyond this point.  At the very end, I did a tiny bit of very delicate shading to the paper clip, which gave it a more 3-dimensional look.

TECHNICAL NOTE: I worked a bit differently this tutorial, for the first time drawing from a photo of my hand rather than from life.  I did this because I’ve been frustrated in past tutorials that I haven’t been able to publish a photo taken from the exact angle from which I see my hand when drawing from life.  Since I took the photo first this time, I drew it from the exact angle you see it from in the tutorial, enabling me to point out shapes such as the diamond noted periodically.

The downside of drawing from the photo is that drawing from life provides more visual information than my low-res photo.  As a result, the shading of this drawing is less detailed than in some other recent tutorials.

Hand Drawing Tutorial #9: Drawing the Hand – Or Anything Else (Part 2)

Friday, March 4th, 2011

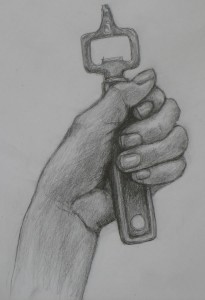
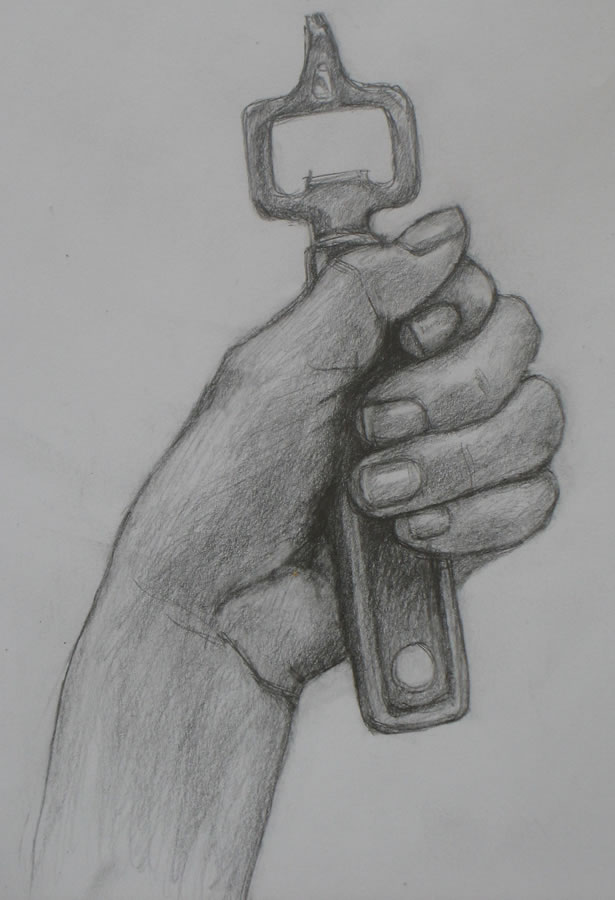
Sketch of my hand holding a bottle opener for Tutorial #9

This is the first of a series of drawing tutorials in which I’ll add an assortment of inanimate objects to each hand pose.  I decided to introduce inanimate objects because in my kind of right-brained drawing technique, there’s actually no difference between sketching a hand or sketching anything else (as long as you’re drawing some kind of model).

This is part two of tutorial #9.  The first part is here.  The end of that post describes the type of object you’ll need for this lesson.

Materials needed and setting up your work space

See the relevant sections of this post for what you’ll need and how to arrange your space.

Then hold your object in your non-drawing hand in a position as close to the one I’ve used as you can.  As always in my tutorials, you don’t have to be exact because I’m teaching a general drawing method, not how to draw specific poses.

Introduction

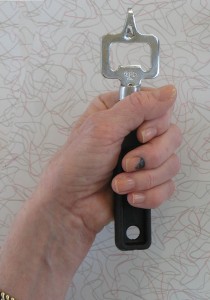
Approximate position of my hand holding a bottle opener for Hand drawing tutorial #9

As you watch the video at the end of this post, notice that I didn’t treat the bottle opener as something different from the hand.  I didn’t draw the hand first and the opener second or vice versa.  I drew the opener as I went along, interspersed with drawing parts of the hand.  The opener and the hand were both pieces of the whole jigsaw puzzle of shapes I was assembling.

You should try the same approach as you draw your own hand.  You can either follow a similar sequence in choosing shapes to sketch as I did, or choose a different sequence.  You should move ahead sketching shapes that you notice or that make sense to you in relation to other pieces of your puzzle.  Remember that your jigsaw pieces need to fit into each other and into the whole.

(It may be helpful for you to review the jigsaw metaphor for right-brained drawing in Tutorial #7, about right-brain drawing as jigsaw puzzle.  The technique I use here is exactly the same.)

Drawing the hand holding an object

The first line I made for the bottle opener happened in Frame 4, when I noticed that its black handle ran roughly parallel and close to a vertical line I had drawn in Frame 3 to help me locate the correct place for the bottom of the wrist.

I then drew a few more lines for the handle, but I didn’t complete the top of the bottle opener till later (beginning in Frame 15).  Instead, I moved to where my fingers held the handle.  I drew the juncture between the lines of my fingers and those of the handle.

Draw the first few lines depicting your hand to one side of your object.  Then focus your right-brain seeing to observe where some of the lines of your object are in relation to the hand-shapes you’ve already sketched in.  Draw them; then move on to shapes that intersect them, whether part of your hand or your object.

My shading of the opener (beginning in Frame 30) was also interspersed with shading the hand.  The shapes of the opener’s light and dark areas were jigsaw pieces that fit into the light and dark bits of the hand.

The most helpful shape in this drawing

The most helpful shape in this hand pose is the dark space between thumb and fingertips, where the opener handle rests in the palm.  It’s the very center of the drawing.  I used this space repeatedly, beginning in Frame 11, to measure and judge what I was drawing all around it.  I used the darkness of its shading as a benchmark for all the other tones.

Your drawing is likely to have a similar dark space where your fingertips meet your thumb/palm.  Focus on drawing and shading this space accurately, and it will help you draw everything around it.

You may want to do one run-through of the video below focusing just on the changes in form and shading of this “negative space” between my fingertips and palm, as they evolved in during the course of my drawing.

{"numImgs":"50","constrain":"height","cvalue":"450","shellcss":"width:337px;padding:4px;margin:14px auto 0;"}

Sometimes the hardest thing about adding an object to a hand drawing is the fact that the object interrupts the the jigsaw hand pieces you’re used to fitting together into a single whole.  It happened to me in this drawing.  I had a lot of difficulty accurately assessing the shapes of the fingers and palm around the bottle opener.  So a lot of this video is taken up not with sketching the opener, which was simple, but with endless revisions of parts of the hand.

This drawing was like the proverbial sausage, not pretty in the making.  But as always, I recommend forging ahead.  The more you practice, the better your drawing ability will become.

Note: The lightened image Frames 42-45, and the sudden darkening beginning Frame 47, are accidental lighting artifacts.  They were not part of my drawing process.

Hand Drawing Tutorial #9: Drawing The Hand – Or Anything Else (Part 1)

Wednesday, February 16th, 2011

This is the introduction to a new series of hand poses which include inanimate objects.  The actual tutorial and video demo of pose #9 will appear in my next post.

Meanwhile, you have a bit of homework to prepare for the tutorial:  you need to find a good object to hold in your sketch.  Please see the last section at the bottom of this post to learn what you’re looking for.

Sketch of hand holding bottle opener

In my next few hand drawing tutorials, I’m going to add an assortment of inanimate objects to each hand pose – to begin with, I chose a bottle opener (right).  Over time, we’ll practice sketching the hand from various angles holding items of diverse shapes and sizes.

I decided to introduce inanimate objects because in my kind of right-brained drawing technique, there’s actually no difference between sketching a hand or sketching anything else – as long as you’re drawing some kind of model (a live model or a photo).  In my rather Zen approach, you pay no attention to whether you’re drawing a hand or a waterfall.  You do this because you need to empty your mind of everything that gets in the way of your seeing the shapes, shadows, and highlights that are actually in front of you.

In pure right-brained drawing you learn to see what you’re drawing in a very abstract way.  You look only at shapes, angles, darks, lights. 

Parad0xically, this abstract approach can produce hyper-realistic results.

Other types of hand drawing tutorials

My method is almost the opposite of the approach taken in most hand drawing tutorials.  They recommend learning as much as possible about the anatomy of the hand and body proportions, and viewing the hand as made of sub-parts of different volumes.

Illustration from Ron Lemem's hand tutorial. Click on the image to go to this lesson on his website.

For me, learning all that stuff would completely inhibit my drawing, as I wrote in “Me against Da Vinci: What’s the best way to draw?”.

But I encourage you to explore all kinds of approaches to find what works best for you.  A couple of good websites to review for non-me techniques are Ron Lemen’s and odduckoasis.

I suspect that learning about e. g. hand anatomy is important if you’re drawing purely from your imagination.  If you’re drawing a comic book, for example, you probably want to know how to quickly suggest a hand in an appropriate position without having to find a model.

If you’re drawing from life, though, I highly recommend that you do your best to empty your head of all left-brain information about anatomy or the function of the hand, or anything else.  If you hold that information in the front of your mind, it will get in the way of your focusing on what you’re drawing.

This is an intriguing paradox: you fill your brain with technical anatomy in order to draw from memory rather than from life.  But if you want to draw realistically from life, the best approach is the very abstract, right-brained one.  I’ve observed this paradox in another earlier post, about Marie McCann-Barab’s paintings (scroll down to the last section, “Yin and/or Yang”).

I’m very interested in drawing what’s in my imagination, these days in my Playground of the Autocrats triptychs.  But my preferred method of drawing is still always from life because I find its infinite variations thrilling.  So I always look for models that approximate what’s in my imagination, rather than drawing purely from memory.  As I wrote then,

For me, the everyday visual world is full of such surprises that I don’t want to just repeat from memory something I’ve drawn or seen in the past.  Drawing from my memory of “what an X looks like,” by definition means I’ve developed a somewhat standardized way of seeing and drawing X.  For me – and maybe for you – there’s nothing like the magical pleasure of discovering what’s unique about the particular “X” I’m drawing at that moment, and capturing that uniqueness on paper.

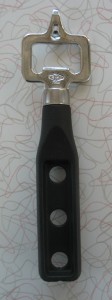
Bottle opener I used for Hand tutorial #9 (see next post for demo)

Your scavenger hunt for your object for Hand Tutorial #9

In the next few days, keep your eyes open for an appropriate object for our first pose of the hand holding an object.  The ideal object for your first sketch is something like the bottle opener I chose (right).

Here are the qualities you should look for:

  1. A fairly simple object – don’t choose something with complicated patterns or writing on it, like a food bottle.  In general, an object with some straight lines, rather than entirely curvy, may be easiest for your first drawing.
  2. An opaque object – don’t choose something transparent.
  3. A fairly compact object – don’t choose something long like a knife or dowel that will extend far from your hand.
  4. A mildly interestingly-shaped object – my bottle opener was perfect because of the nice enclosed negative space and the nice, small number of distinctive details.
  5. If you’re able to find a bottle opener like mine, or an object with a similar size and shape, it may be most helpful.  However, if you can’t find that, rest assured the technique will be the same no matter what your object is.

Have fun with your hunt, and see you next post!