This is the second in a series of online drawing lessons using your hand as your model. The first, most basic lesson is here.
The hand is so complicated visually, so able to move its parts in infinite ways relative to the various other parts, that a small movement creates new shapes and new challenges in drawing.
At the end of this lesson, you’ll find a time lapse photo sequence of my entire Tutorial #2 drawing process, from my first pencil line to the finished sketch.
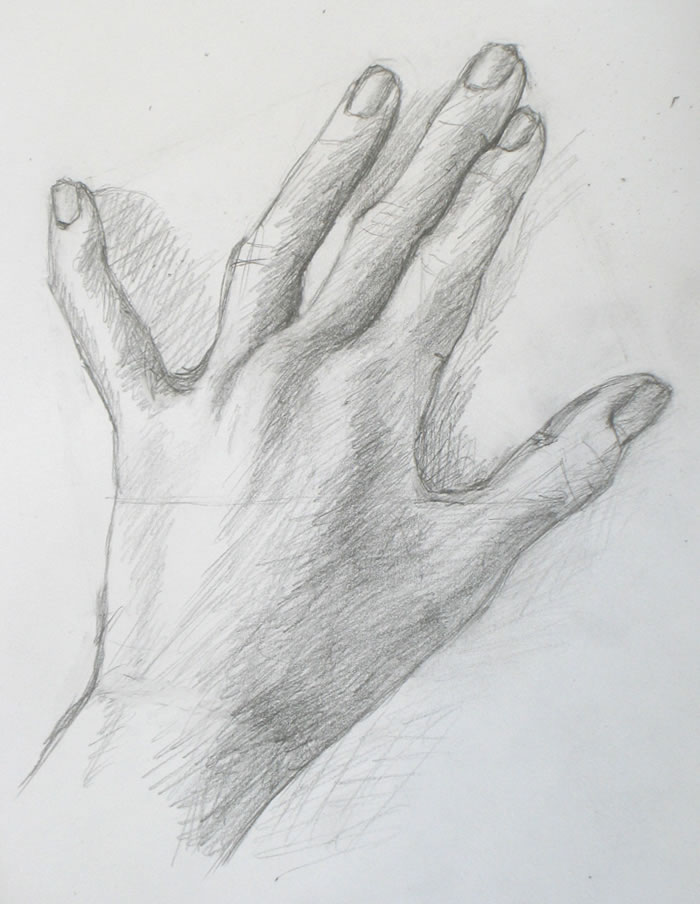
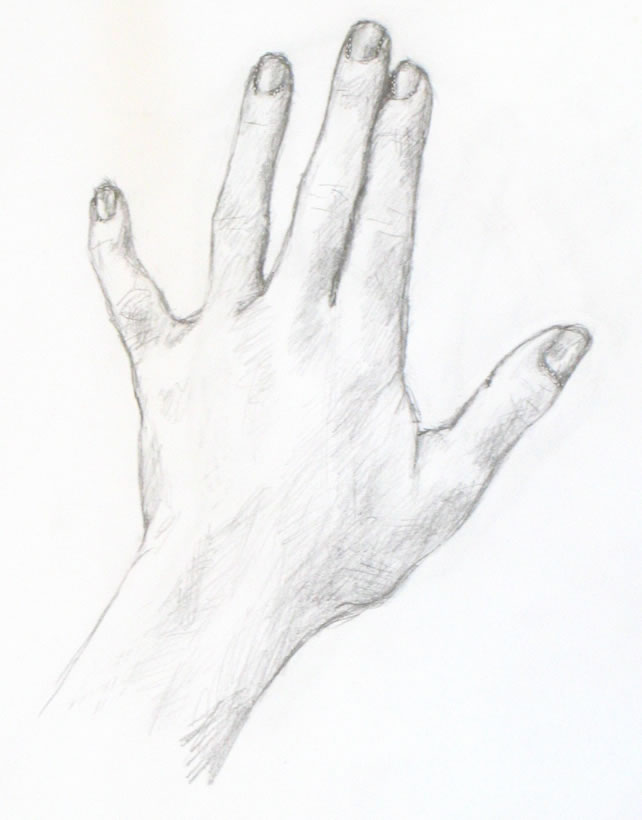
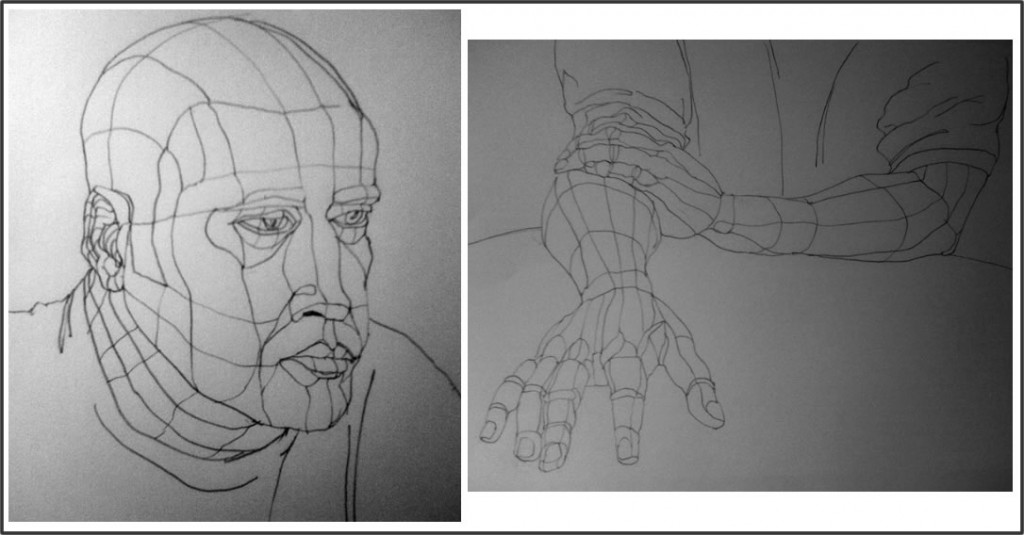
This lesson's hand sketch. You can still see a light line across the back of the hand, which I drew as a guide.
Materials you’ll need
You can use any paper and pencil or charcoal that you enjoy. I’ve used the same paper, pencil, and tape for this lesson as I did in the first. Please look back for specifics if you want them.
My Tutorial #2 drawing (right) appears darker than the first demo, even though I used the same simple pencil and other materials. The reason is that this time, I made an effort to draw more heavily in order to make even the guidelines I sketched more visible to you.
Setting up to draw
Tape a piece of paper to your drawing surface, leaving enough space to place your non-drawing hand next to the paper as your model. For important explanation and a photo, please go here
Placing your hand
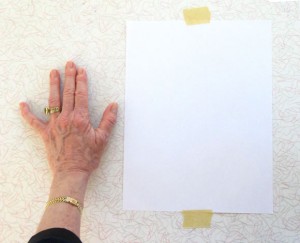
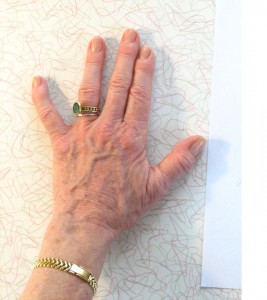
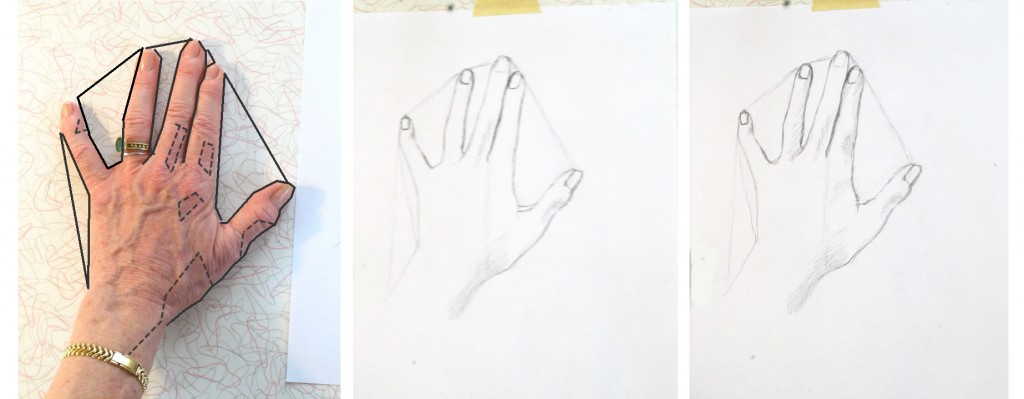
In this lesson, we’ll draw a slight variation of the hand “pose” from the first lesson. In the first lesson, we drew the most simple version possible: the hand placed flat, viewed from the back. For this lesson, I began by setting my hand and fingers in the exactly the same position as in Tutorial #1. Then I made a single change: I lifted my pointer-finger knuckle upward, well off the table. (The lighting this time is also different.)
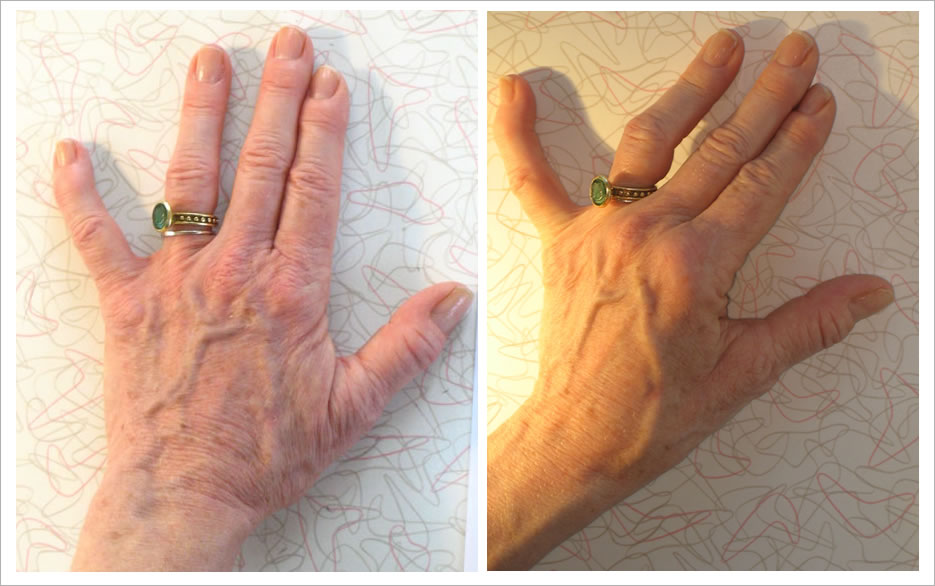
Compare the positions of the hand in Demo #1 (left) and Demo #2 (right). The fingers and bottom of the hand are similar. But I've raised the knuckle of my pointer finger off the table, creating a more complex subject for sketching.
I also placed a strong light source (a halogen lamp) to the left side of my hand. This creates the intense lights and darks that help the artist create the illusion of three-dimensionality.
As always, start by drawing negative space
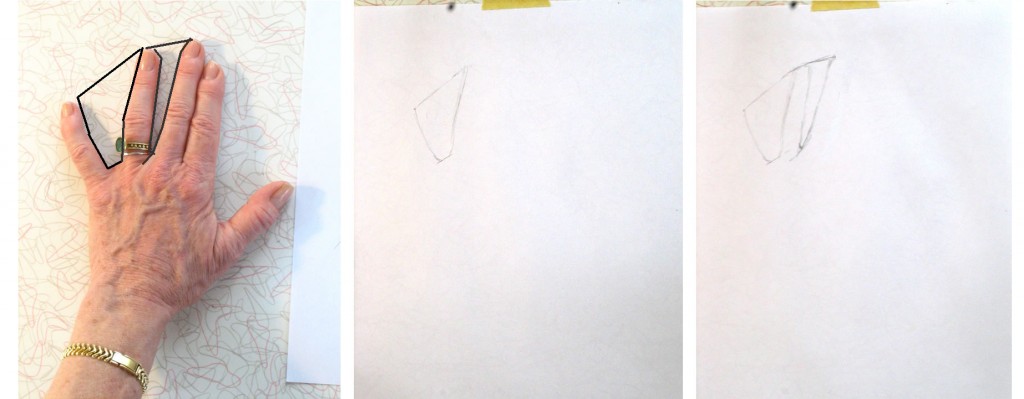
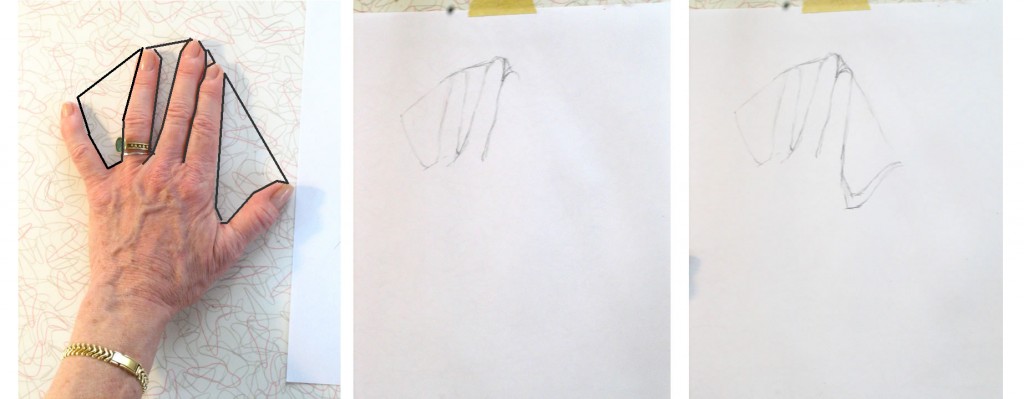
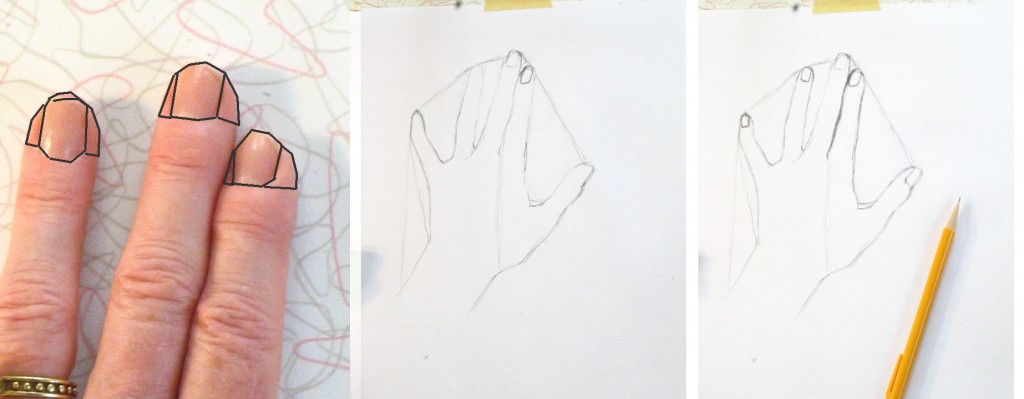
For me, the key to beginning drawing any subject matter is to find easily-drawn areas of negative space. For our hand poses, the obvious basic negative spaces are those between three of the fingers. Look at the spaces between the pinky and ring finger, and between the ring and middle fingers in each pose:
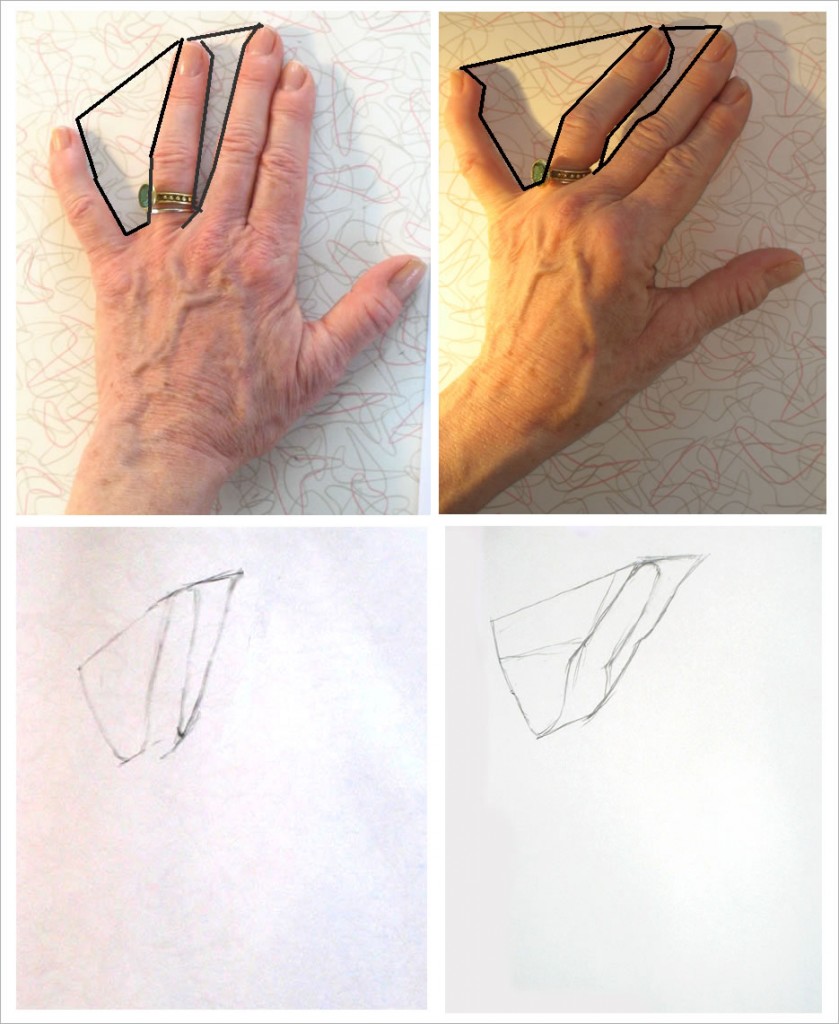
I've drawn black lines over the photos of each hand pose, outlining two spaces between fingers. Below each photo are the first lines in my drawing of the hand above it. Note that in the second drawing, I broke the negative space down into more geometric shapes (the sketched guidelines) than in the first drawing.
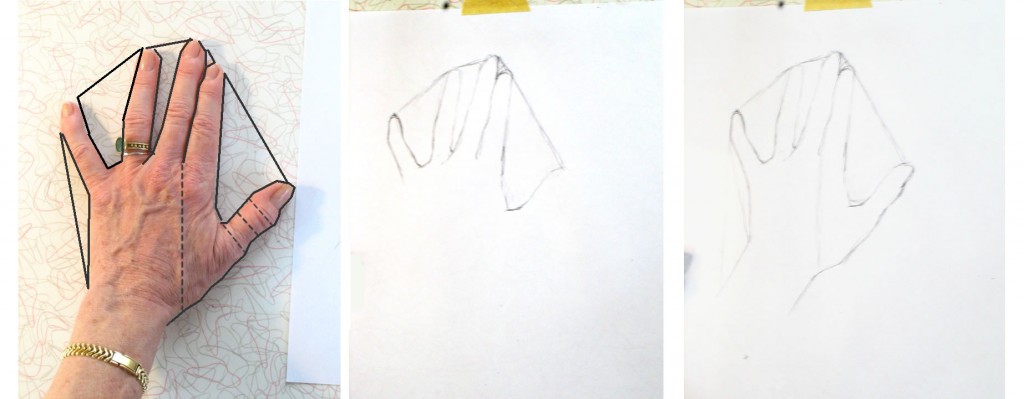
Continue “carving out” the negative space all around the hand to create its complete outline, as we did last lesson.
Making a course-correction by drawing guidelines
When I’d completed the outline of my hand, it looked really off (below, left). The thumb was too large, and the entire hand seemed too stretched out to the right side. I had clearly made a mistake somewhere along the way. But what was it? What had I done wrong, and how could I correct it?
Don’t worry, this kind of mistake happens all the time! What you need to do now is to look over your hand to find relationships between lines you think are correct and the areas you feel you may have gotten wrong.
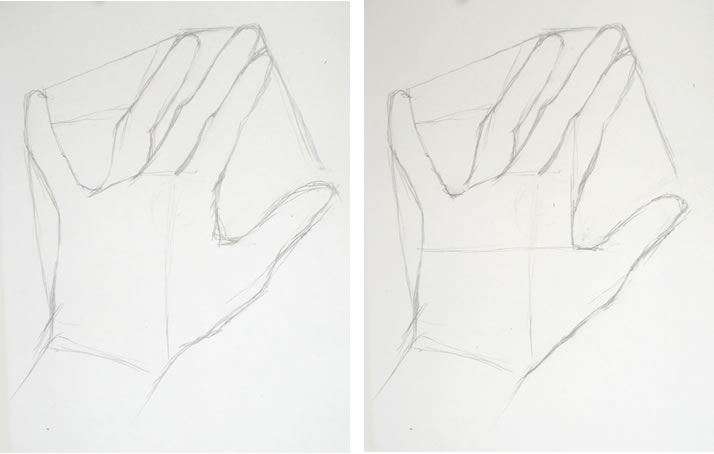
My first completed outline (above left) was clearly off. I corrected my drawing (above, right) using a horizontal guideline across the back of the hand and a vertical one intersecting it at the base of the thumb.
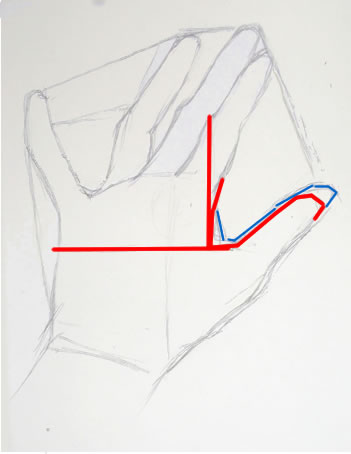
Following this method, I realized I had mis-placed the “scoop” of negative space between the forefinger and thumb. To help you see this more easily, I’ve colored over the incorrect inner thumb line in blue (see right).
The edge of the hand between the forefinger and base of the thumb actually lies directly under the first joint of the forefinger (note my vertical guideline, right).
I figured out where the horizontal portion of the thumb-base should be by drawing a horizontal line from the point on the other side of the hand directly across from it (see horizontal guideline, right). It may seem odd to figure out the placement of the thumb by looking at its relationship to the far side of the hand. But it works. And it helps you check whether your entire drawing is shaping up properly in relation to the whole.
Now for the drawing demo
I think you’ve probably had enough technical verbiage for this lesson. So just continue from here the same way we did in Tutorial #1. It may help you to check out the time-lapse sequence of my drawing below. You can move through it at your own pace by clicking the “stop” button at the bottom when you’re ready to see the next image.
{"numImgs":"29","constrain":"height","cvalue":"450","shellcss":"width:348px;padding:4px;margin:14px auto 0;"}
A couple moments you may have noticed in the “video:”
First: at some point, I erased the negative-space guidelines I had drawn in the very beginning from each finger tip to the next. It’s often fun seeing guidelines like this in a finished sketch, but they were distracting me as I was trying to evaluate lights and darks for the shading. So I got rid of them.
Second: this time I decided to fill in the shadows my hand cast on the table. I first considered doing this because the left side of the middle finger was so light (because of the halogen lamp) that I had nothing to define its edge. I thought I’d try defining it by the shadow next to it. Once I had started with that finger, of course I had to finish the entire shadow of my hand. I wouldn’t always do this in a quick sketch. But in this case it helped, and I liked the result.
