This is an advanced tutorial. If you’re just beginning, please start with earlier lessons such as A Simple Drawing of the Hand and work your way forward.
I played racquetball last weekend for the first time in many months. I was surprised to find that my playing level hadn’t fallen off despite my lack of court-time. If anything, I’d improved.
Here’s what I think helped me: I hadn’t been hitting racquet balls in months, but I had been drawing constantly.
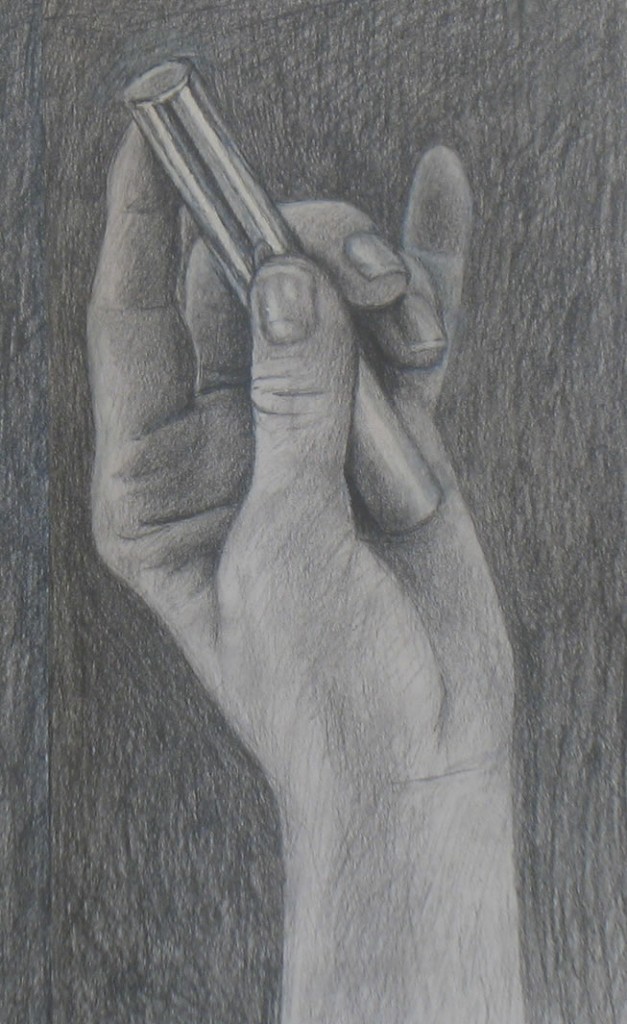
Hand pose, Tutorial #11
When I’m drawing, my utter focus on each “jigsaw piece” is a lot like the utter focus on the ball in racket sports. In both, you need to get into a zen-like state of total concentration on one small bit of your visual environment. Your hand/arms/legs then know automatically what to do to sketch that bit or smack that ball.
I don’t want to make grandiose claims here. But I suspect that learning to see in order to draw may improve your sports skills as well – at least in sports that involve connecting with a fast-moving ball.
And maybe this underlines the fact that learning to draw is all about learning to see. To me, the most important part of learning to draw isn’t acquiring knowledge about proportions, perspective, or how to draw this or that. It’s about training yourself to focus on and see what’s right in front of you.
Hand pose with shiny tube
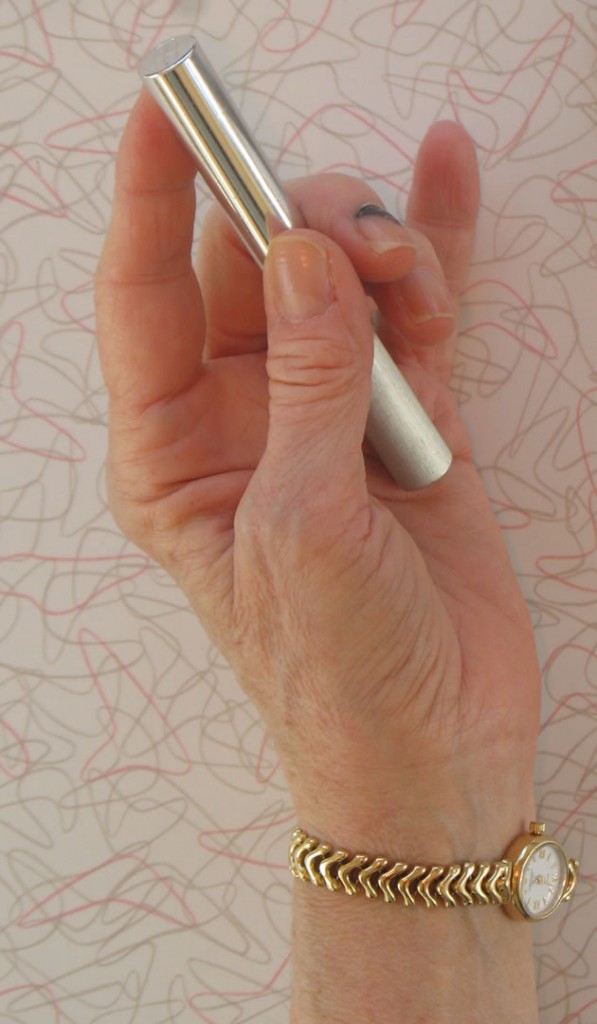
- Tutorial #11 hand pose with shiny tube
The object I chose for this hand pose is a metal tube. It’s actually a lipstick, but I chose it because one end of it is very shiny, and the other end dull. I think this combination – a simple shape with a very shiny surface – may help you learn to see in the highly focused way you need to draw (and maybe to play sports).
I could have just drawn the tube without the hand for this tutorial. But for whatever reason, I’m not happy drawing only inanimate objects. For me to enjoy what I’m doing, I need a person (or part thereof) connected with the object.
But if you’re able to find some kind of shiny tube, you might try first drawing just that, without your hand.
If you can’t find a shiny tube, experiment with drawing from the image of my hand on your computer screen. Or try just the close-ups of the lipstick tube, below. (See relevant sections of this post for materials and work setup.)
How does an artist make a shiny surface look shiny?
Ahh, here’s where seeing comes in. What do you see when you look at that tube not as a “shiny tube,” but as a piece of a 2-D jigsaw puzzle? Can you see that it’s made up largely of a series of stripes of white, gray, dull green, beige, and other colors?
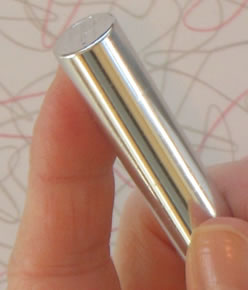
There’s also the reflection of my thumb in one spot just above my real thumb. And toward the sides of the tube, the stripes aren’t absolutely parallel the way they are in its front/center.
If you replicate these and other details in your drawing, your tube will look shiny.
By the way, I’m always tempted to photoshop out my smashed blue fingernail, but I don’t because I want you to be able to see the natural texture of the nail. Nails are also shiny, though less so than the tube – you can see it most clearly on my thumb. If you draw that semi-shininess, it will make your drawing look realistic.
Look at the contrast between the shiny end of the tube and the other, duller end (right).
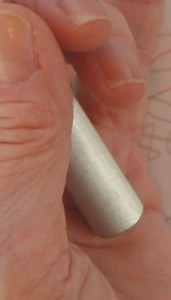
Dull end of tube - notice how the shading here is gradual from left to right, not in distinct stripes as with the shiny end of the tube.
Here, the shading fades very gradually from dark on the left side to light on the right. If you replicate that gradual shading – along with the bit of white highlight that begins right beneath my thumb – this end of your tube will look like dull metal and will not look shiny.
Why does my jigsaw approach to drawing work?
When you’re drawing, you are representing the 3-dimensional world on a flat surface. So you need to learn to perceive the 3-D world in two dimensions. Imagining this process as building a jigsaw puzzle can help you because puzzles are exactly this: representations of the 3-D world on flat cardboard.
Video demo #11
The video below shows how I drew my hand pose holding a lipstick tube. Part 2 of the video, showing the shading that creates the shiny look of the tube, will be in my next post.
For now, watch how I built the jigsaw puzzle of this hand pose. (If you haven’t already watched my jigsaw videos here and here, please do it now in order to understand what’s going on in my mind as I draw.)
In this lipstick-tube pose, I kept refining each jigsaw piece as I went along. I often didn’t get the size and shape perfectly on the first try. But as always, the more shapes I drew, the more reference points I had to judge how to correct ones I’d already drawn. Even after I began shading (see video next post), I continued to improve basic shapes and sizes of fingers, joints, and nails.
Notice how wrinkles and finger joints make great sub-units that help you judge and measure your shapes. Periodically, I drew guidelines (later erased) from an already-sketched jigsaw piece to help me decide where and how to draw another piece.
The nails of the middle and ring fingers were especially difficult to place and draw properly because of their angle. I just kept at it, though, correcting it little by little. Sometimes things got worse before they got better! But eventually I got it right. If you persist in this way, you’ll get good results, too!
Note that the thumb in this pose appears wider than the right half of the hand because of the angle and position of each.. This is an example of why learning standard body proportions isn’t always that helpful. When you’re drawing a body part from a direction other than simple and straight on, proportions appear distorted by the perspective you’re viewing it from.
{"numImgs":"56","constrain":"height","cvalue":"420","shellcss":"width:270px;padding:4px;margin:14px auto 0;"}
Come back next post for more on how to create the tube’s shiny surface.
