In this post, I’m going to begin to show you how I do quick life drawings. If you’ve always wanted to learn to draw, or just to improve your drawing skills, playing this Angle-Abstraction Game will probably help you quite a bit.
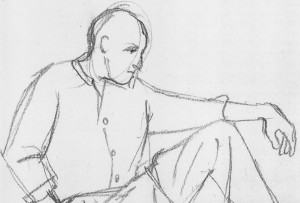
To demonstrate my process, I’ll use one of my 2-minute life drawings of Don Duga, of the School of Visual Arts in New York City.
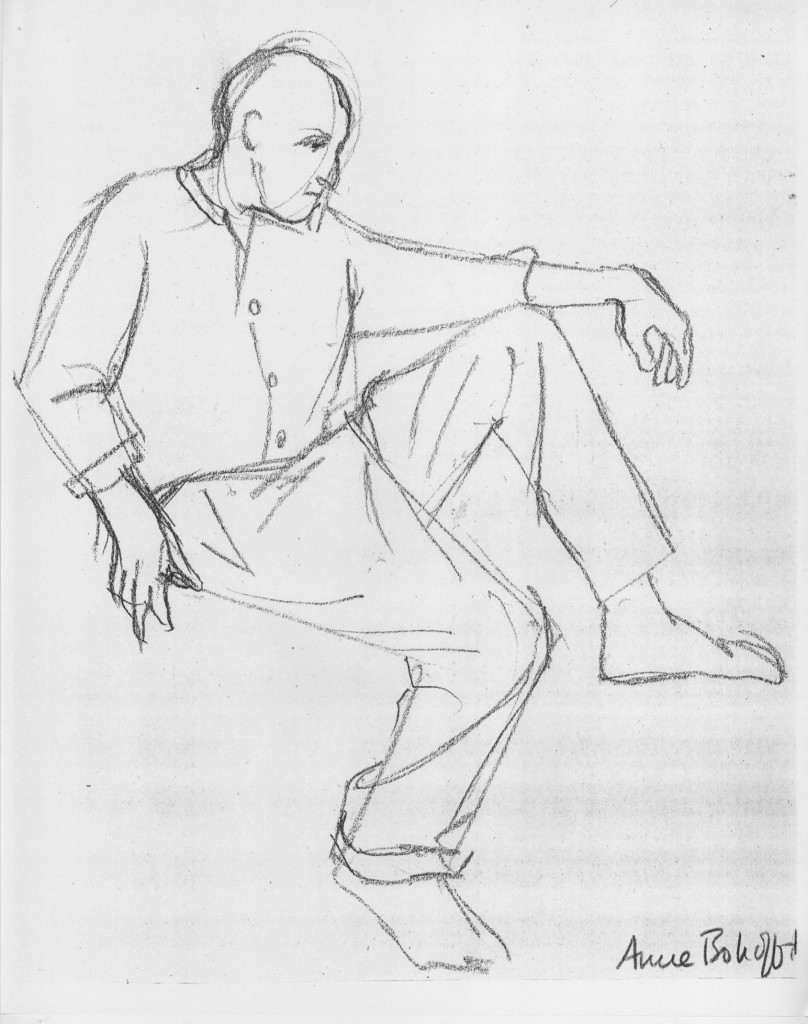
My 2-minute sketch of Don Duga
Don used to run a monthly life drawing session for members of East-Coast ASIFA (the international animation society). One night the model didn’t show up, so Don posed for us himself.
Since I can’t post the actual Don here to enable you to see the 3-dimensional model I was drawing from, we’ll have to do this lesson from my sketch alone.
The goal of quick life drawings is to learn to sketch people within a few minutes or seconds, which is all the time artists often get in real life. You’re not going for detail here. You’re learning to make fast sketches that convey a solid body with limbs, head, and torso positioned in ways that are viable in real life. (There are also more detailed life drawings – an example of one of mine is toward the end of this post.)
My personal key to success in life drawing has been learning to abstract the way I see. I view the pose as a series of angles and shapes, either positive (the person) or “negative” (the space around the person). I’ve named this the “Angle-Abstraction Game.”
It may sound technical and inhuman to focus on angles and shapes when drawing a living person. But abstracting the way you see is paradoxically the best way to capture the unique posture of each very special human being.
Let’s get started with the lesson. You might follow along step by step below with your own drawing to get a better feel for what I’m describing. Boiled down, this process begins with drawing a simple shape, in this case an oval. You are then able to draw lines emerging from this shape which correspond to various elements of the body. With each added line, you build exponentially more reference points from which to base your next lines and angles.
Astonishingly, from this mess of geometry, a human form will appear. The magic moment when it suddenly does is the reward for forging through any difficulties that precede it!
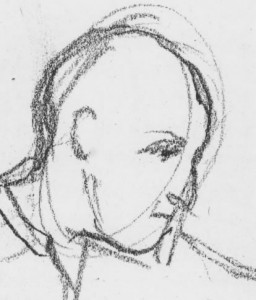
Don Duga sketch detail
I often begin a life drawing with a rough egg-shape for the head. For many poses, this is the easiest way to orient the rest of the piece. (In the figures below, each line is color coded to match the text describing it.)
In the finished sketch of Don, you can see the lines of my egg faintly under the facial detail I added later.
The important thing with the egg is to set it at the correct angle. Here’s your first moment of abstracting what you’re seeing. Look at the head purely as an oval that’s tilted at some angle or other. Forget hair, forget facial detail – forget even that this is a head. Just play this game with yourself: Can you get that oval tilted properly? What direction is it tilted? Straight up and down? Toward left or right? Bent way over or only slightly bowed?
(Oh, and place the head on the paper roughly where it is in the pose, so you’ll have space on the page for the rest of the body. In this case, Don’s head needed to be placed in the upper left of the page.)
Now quickly add a single line along the side of your oval, indicating the front plane of the profile. Don’t worry yet about the nose or eyes or anything else that makes this a face. Just look at the fundamental flat plane of the face and play the angle-abstraction game with yourself: what is the angle of the plane on the front your model’s oval? How closely can you replicate it on your paper?
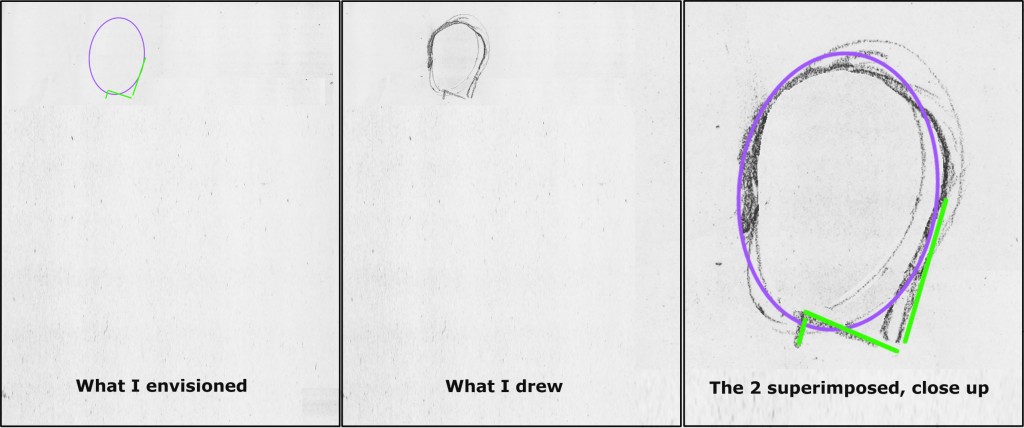
Now add a line indicating the underside of the chin, using the same angle-abstraction game. Last, really look closely and add a quick line for the neck. Forget that it’s a neck. Just ask yourself: Where along the bottom of your model’s oval does that line emerge? What angle does it slant at, and how long is it? Getting these angles down accurately on your paper will help you accomplish the entire rest of the drawing.
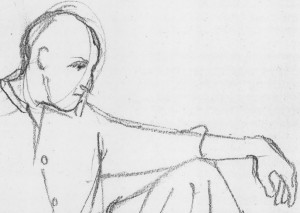
Don Duga sketch detail
Continuing to move as rapidly as you can, look at the top edge of the model’s outstretched arm. Forget that it’s an arm. See it as a line that emerges from the face-plane line. Play your game: Where along the face-plane does it emerge? What angle does it form?
In this particular pose of Don’s, this line emerges at the level of the chin and moves to the right, slanting gradually downward.
How long should this line extend? As you practice drawing, you’ll get better at sensing how long lines should be. Meanwhile, you can use the head oval as a rough measuring unit: the line is about twice as long as the width of the oval it’s emerging from.
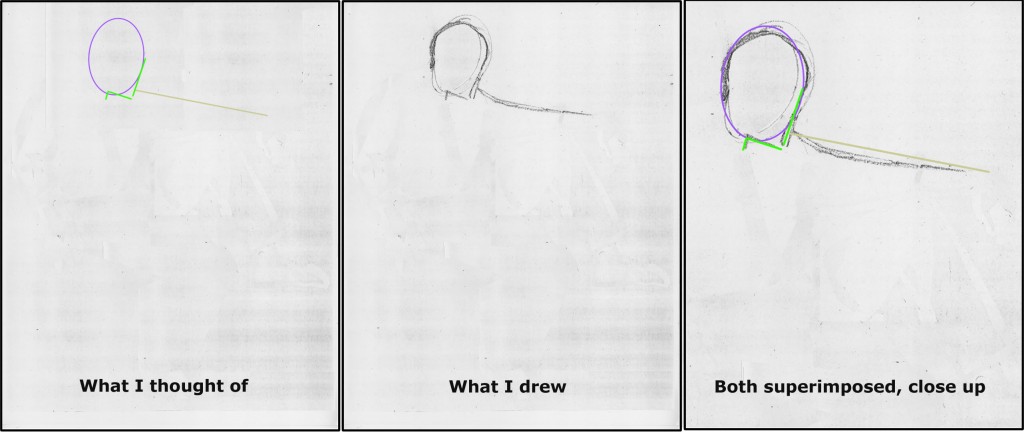
When I drew the line, I put a bit of a bend in it (where shoulder meets arm). But fundamentally I knew where I should draw it because in my mind’s eye, I was seeing it as a line emerging from the face at an angle which I could easily replicate on the page.
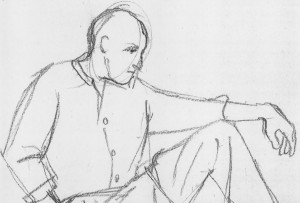
Don sketch detail
Now quickly move to the other shoulder. Play the game with yourself: Where does the line of that shoulder emerge from the other side of the head-egg? At the same level as the first shoulder line? Above it? Below it?
And what angle does it form? Does it slant up or down as it comes out of the egg? Draw it.
Next, look at the outside line of the arm at the farthest left side of the pose. What angle does that form with its shoulder line? Draw it.
Here you may notice that I first sketched a straight line to help me get the angle accurately. I then drew a second line, more bowed, to follow the curve of Don’s shirt sleeve.
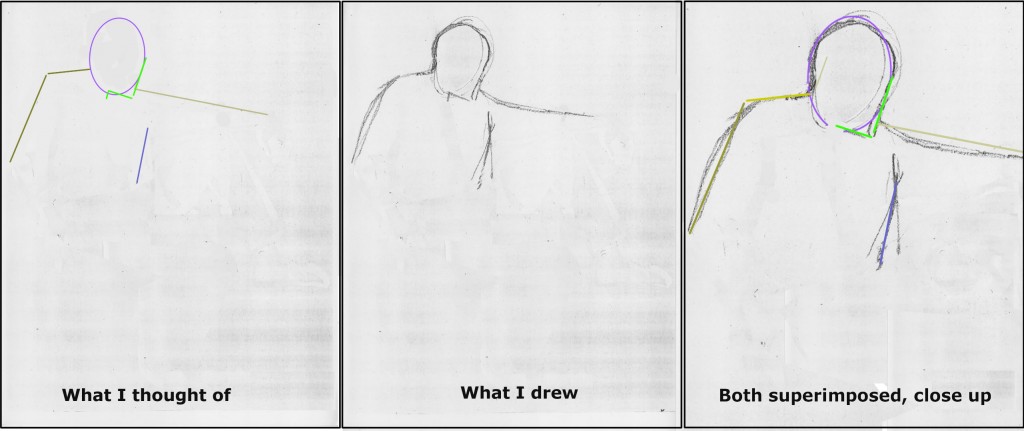
Things are really getting interesting now because you have so many reference lines built up! From now on, you have a bunch of options for lines nearby to determine where each new one should be placed.
Next I moved to the line of the front of Don’s shirt. First of all, ask yourself where the top of Don’s shirt front should begin. Where is the top of that line in relation to the head oval, for example? You can easily figure that out by imagining a plumb line dropped from the farthest-right point of the head-egg. You can see that I first sketched in that “plumb line” exactly vertically. But then I realized it shouldn’t be straight up and down. It’s tilted.
So back to my game: How could I quickly determine the proper tilt for Don’s shirt front? I noticed that it’s the same as that of the face profile plane. So I drew that line parallel to the face plane.
As you draw, you may choose other reference points than the ones I chose. That’s great! The important thing is that you are finding relationships in lines that have come before which make sense to you as guides for each new line you draw.
Don Duga sketch detail
We’ve now reached a moment that’s always a lift to me: a negative space enclosed by the model’s body. In this case, it’s a triangle. (Can you find it in the sketch to the right?) To me, a triangle is always easier to size up than a line because a triangle has volume. A line is a wispy thing floating in emptiness, but a triangle has dimension!
(By the way, the order I’m following here is not preordained. As you practice on your own with other models, you should move through shapes and lines as you notice their relationships to what you’ve already drawn. Try to cover the entire body very quickly using basic shapes. Only after that should you go back to add as much detail as you have time for before you model shifts position.)
Probably the easiest way to generate the triangle bounded by Don’s shirt, arm, and thigh is to first sketch the bottom edge of the arm. Play the game with yourself: At its left end, where on Don’s already-drawn shirt front does this line emerge? Does it slant up or down? What’s the rough angle of the slant? At its right end, roughly how far from the upper edge of the sleeve should the lower line end (= how thick is Don’s wrist)? Another way to check your drawing’s accuracy is: If you envision the entire arm as a not-quite-complete cone lying on its side, what should its overall shape be? How thick is the cone at its widest end, and how narrow at the other end?
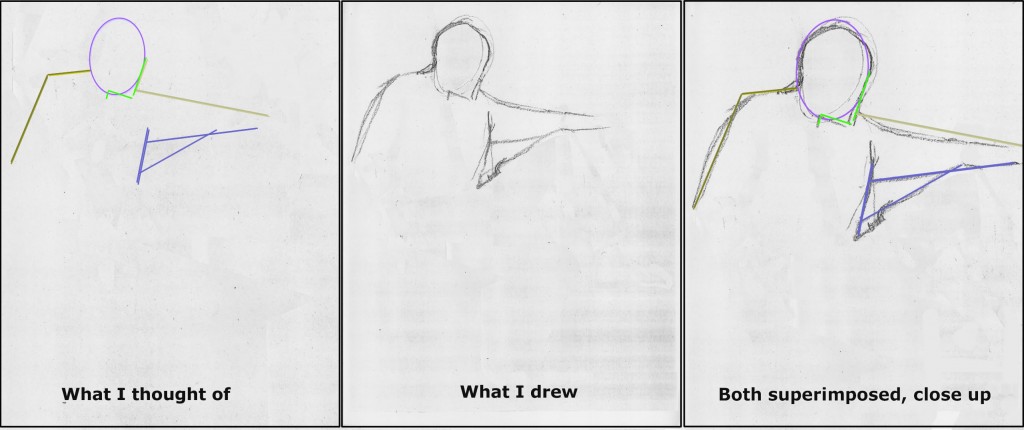
Finally, complete the triangle by drawing the edge formed by the top of Don’s thigh. Focus on the broad sweep of the long part of this line, ignoring for the time being the fact that folds in his pant leg create a dip in the line close to his shirt front. Play the game with yourself: Where on Don’s shirt front does this line emerge on the left, how much does it slant, and where does it intersect with the bottom edge of Don’s sleeve?
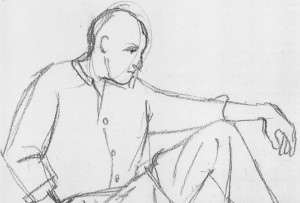
Don Duga sketch detail
Last, check your accuracy by looking at the overall volume of your triangle. Does it have the same rough size as the negative space bounded by Don’s arm, thigh, and shirt? If not, check to see which of your angles or line-lengths is wrong and correct it.
Now let’s get the other side of Don’s torso marked. I drew a quick curved line. I used the shoulder on the left as one measure, and also checked whether I had placed this line so it divided the arm–torso space accurately. Would you use these same reference points? What would help you draw this line accurately?
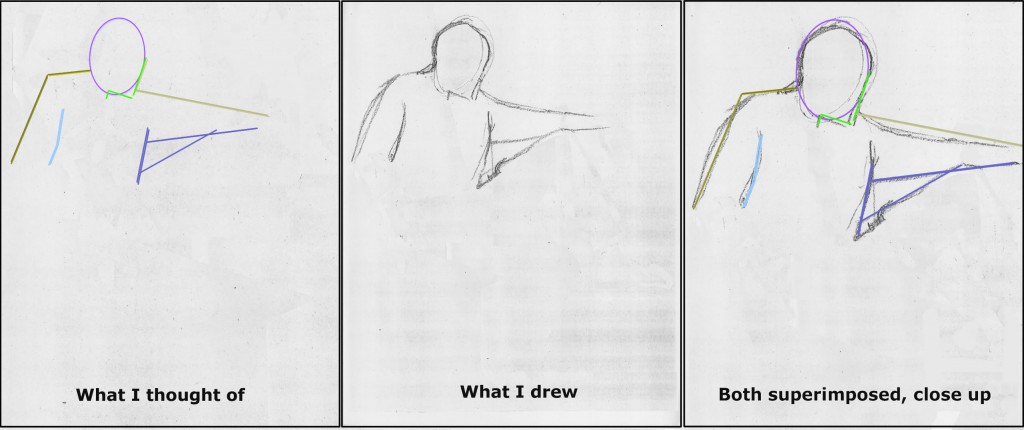
We’ve now formed a solid foundation of technique needed to achieve the first overall mapping of Don’s pose. We’ll continue to apply this technique to complete the rough sketch in my next post, Learn to Draw by Playing the Angle-Abstraction Game: Lesson 2.
